Last Updated on February 9, 2019 by Admin
7.4.2.3 Lab – Configure Firewall Settings Answers
Lab – Configure Firewall Settings (Answers Version)
Answers Note: Red font color or gray highlights indicate text that appears in the Answers copy only.
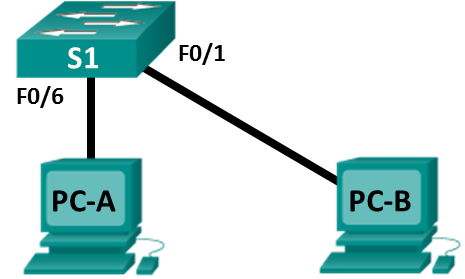
Topology
Addressing Table
| Device | Interface | IP Address | Subnet Mask |
| PC-A | NIC | 192.168.1.10 | 255.255.255.0 |
| PC-B | NIC | 192.168.1.11 | 255.255.255.0 |
Objectives
- Access Windows Firewall settings in order to add a new firewall rule.
- Create a firewall rule to permit ping requests.
- Remove the new firewall rule to return the settings to their previous state.
Background/Scenario
If the members of your team are unable to ping your PC, the firewall may be blocking those requests. Many of the labs in the course suggest that you disable the Windows firewall in order to permit ping requests and responses to execute correctly. Disabling a firewall is not a good recommended practice in an actual production network. In this lab, you will create a rule in the firewall to allow ping requests without putting the PC at risk for other types of attacks. It also describes how to disable the new ICMP rule after you have completed the lab.
Required Resources
- 1 Switch (Cisco 2960 with Cisco IOS Release 15.0(2) lanbasek9 image or comparable)
- 2 PCs (Windows 10)
- Two Ethernet cables as shown in the topology
Step 1: Verify that the Windows Firewall is active and is blocking ICMP requests.
- Right-click Start. Select Network Connections.
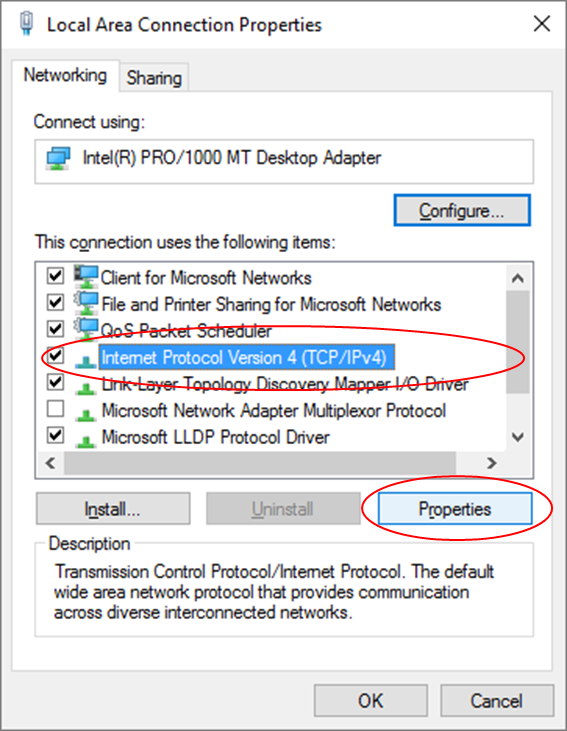
- Right-click the desired network adapter and select Properties.
- Select Internet Protocol Version 4 (TCP/IPv4). Click Properties to configure the two PCs with the static IP addresses shown in the addressing table. No configuration is necessary for a default gateway or a DNS server in this lab, as both PCs are on the same IP network and will use IP addresses instead of domain names.
- Open a command prompt window on PC-A by right-click Start > Command Prompt. Attempt to ping the IP address assigned to PC-B. The ping command should fail. Repeat the ping command on PC-B, attempting to ping the address of PC-A. Ping commands from both PCs should fail, indicating that the Windows firewall is active and is blocking ICMP ping requests.
Note: If the ping succeeds on either PC, verify that the Windows Firewall is active on both machines.
Step 2: Create a new inbound rule allowing ICMP traffic through the firewall.
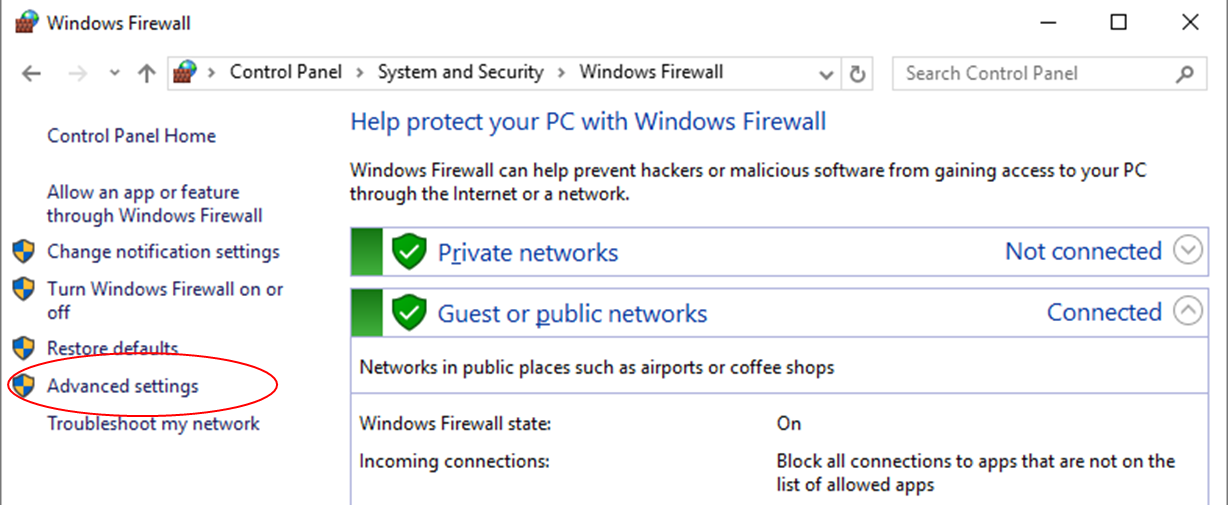
- Configure the firewall settings on PC-A. Click Start and type Firewall. Select Windows Firewall from the results list.
- n the left pane of the Windows Firewall window, click Advanced settings.
- On the Advanced Security window, choose the Inbound Rules option on the left sidebar and then click New Rule… on the right sidebar.
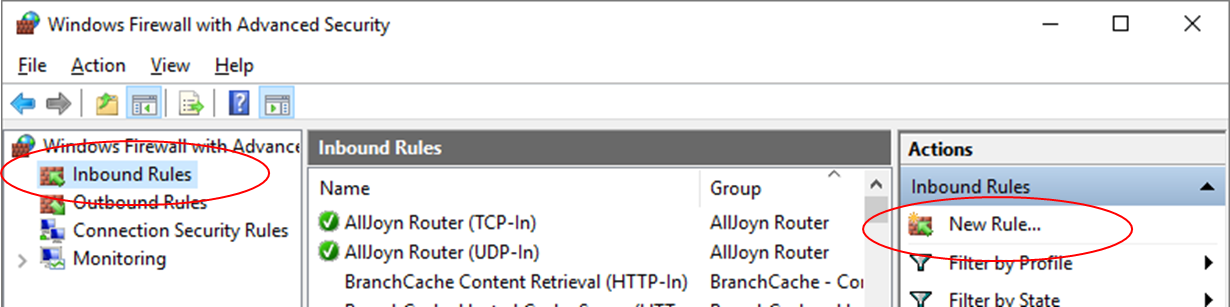
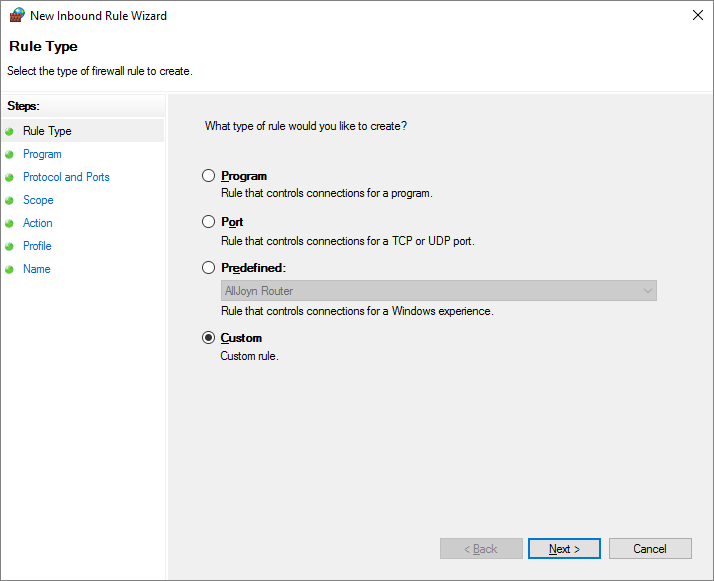
- Clicking on the New Rule menu item launches the New Inbound Rule wizard. On the Rule Type screen, click the Custom radio button and click Next
- In the left pane, click the Protocol and Ports option and using the Protocol type drop-down menu, select ICMPv4, and then click Next.
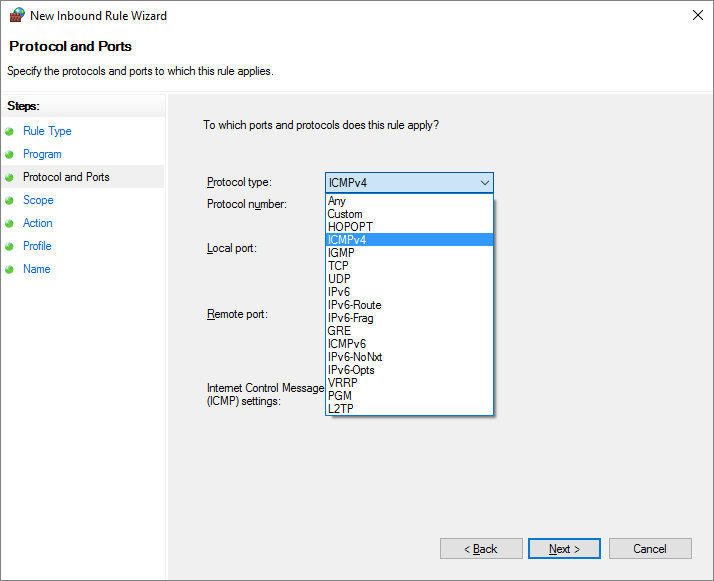 List three protocols, in addition to ICMP, that can be filtered by a new inbound firewall rule.
________________________________________________________________________________________________________________________________________________________________________
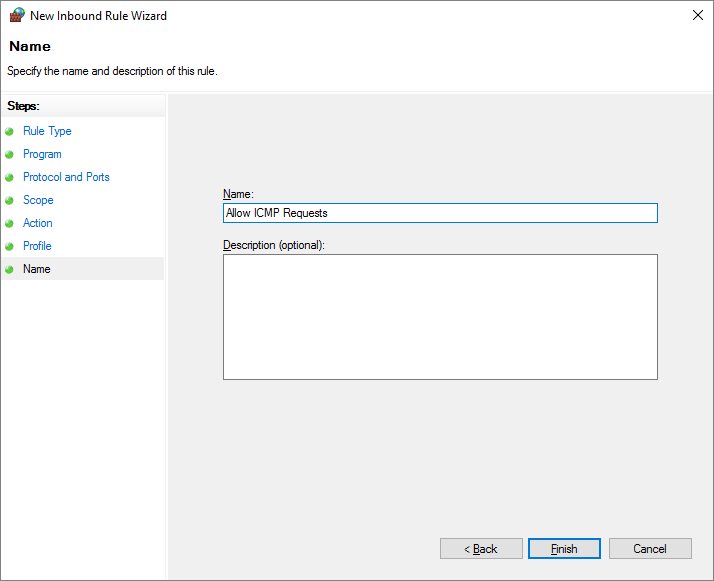
Answers will vary. Some protocols that can be filtered by inbound firewall rules are IGMP, TCP, UDP, and GRE. - In the left pane, click the Name option and in the Name field, type Allow ICMP Requests. Click Finish.
 This new rule should allow your team members to receive ping replies from PC-A. Repeat the commands in Step 2 to add the new rule on PC-B.
 - Test the new firewall rule by repeating the ping commands used in Step 1. This pings should be successful.
If not, review the firewall settings to insure that the new rule is configured correctly.
Step 3: Disabling or deleting the new ICMP rule.
After the lab is complete, you may want to disable or even delete the new rule you created in Step 2. Using the Disable Rule option allows you to enable the rule again at a later date. Deleting the rule permanently deletes it from the list of Inbound Rules.
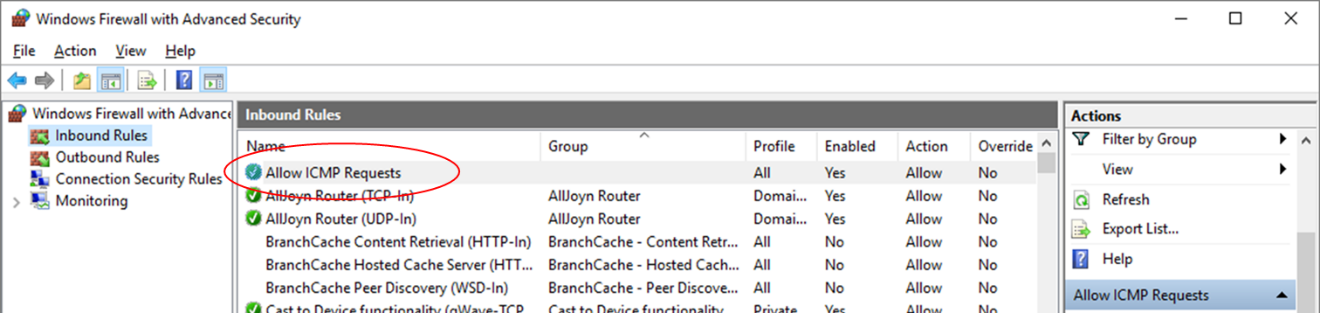
- On the Advanced Security window, in the left pane, click Inbound Rules and then locate the rule you created in Step 1.
- To disable the rule, click the Disable Rule option. When you choose this option, you will see this option change to Enable Rule. You can toggle back and forth between Disable Rule and Enable Rule; the status of the rule also shows in the Enabled column of the Inbound Rules list.
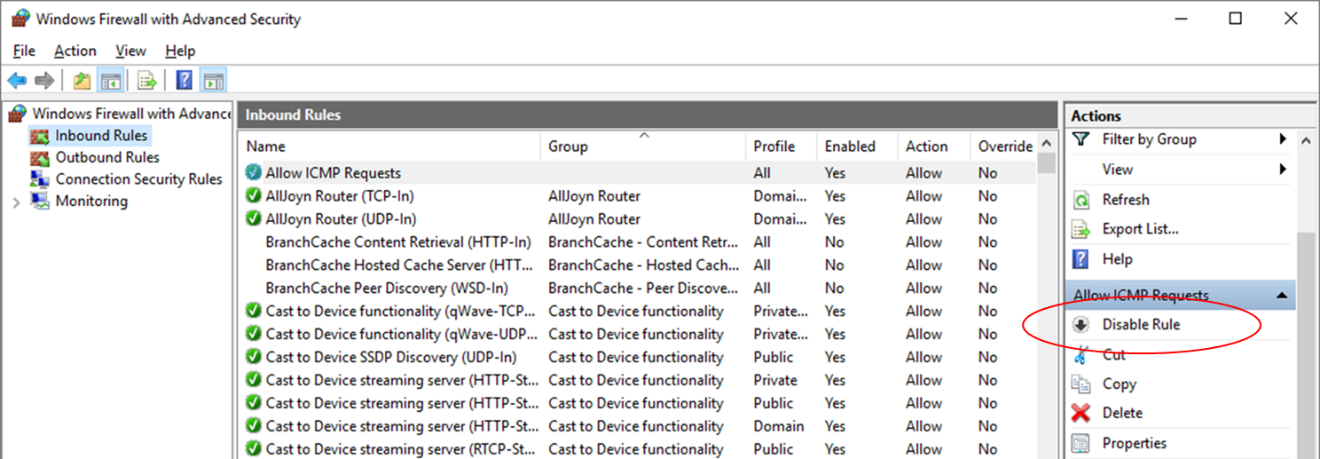
- To permanently delete the ICMP rule, click Delete. If you choose this option, you must re-create the rule again to allow ICMP replies.
- Execute the ping commands performed in Step 1 to verify that the firewall is now blocking the ping requests again.