Last Updated on October 31, 2018 by Admin
6.1.1.9 Lab – Install Third-Party Software in Windows 8 Answers
Lab – Install Third-Party Software in Windows 8 (Answers Version)
Introduction
In this lab, you will install and remove a third party software application supplied by your Answers. You will install the Packet Tracer Windows application.
Recommended Equipment
The following equipment is required for this exercise:
- A computer with Windows 8 installed
- A flash drive or CD with the latest Packet Tracer Windows install package
To download the latest version of Packet Tracer software, login to NetSpace, click Offerings > Packet Tracer. Click the Cisco Packet Tracer or Cisco Packet Tracer (with Tutorial) link and then click the Download button from the resource page that appears.
Step 1: Locating The Installer
- Log on to the computer with the Administrator account and use Windows Explorer to navigate to the folder where the Packet Tracer installer is located. This folder could be on the local hard drive, on an external flash drive or on a CD.
- Locate the PacketTracer###_setup.exe (where ### is the version number) application. Click the PacketTracer6.2_setup.exe icon to start the installation process of the Packet Tracer application. You may need to double-click the icon to start the installation.
Note: The version shown in the file name depends on the version of Packet Tracer you are installing and may vary.
6.1.1.9 Lab – Install Third-Party Software in Windows 8 Answers 01
Step 2: Running the Installer and Installing Packet Tracer
- The Setup – Cisco Packet Tracer 6.2 window opens. Click Next.
Note: The window name may not contain the word “Instructor”. It will depend on the version of Packet Tracer being installed.
6.1.1.9 Lab – Install Third-Party Software in Windows 8 Answers 02
- The License Agreement window opens. Select I accept the agreement, and then click Next.

6.1.1.9 Lab – Install Third-Party Software in Windows 8 Answers 03
- The Select Destination Location window opens. Keep the default settings and click Next.

6.1.1.9 Lab – Install Third-Party Software in Windows 8 Answers 04
What is the default installation location for Packet Tracer?____________________________________________________________________________________
C:\Program Files\Cisco Packet Tracer 6.2iv. Answers may vary. - The Select Start Menu Folder window opens. Keep the default settings. Click Next.

6.1.1.9 Lab – Install Third-Party Software in Windows 8 Answers 05
- The Select Additional Tasks window opens. Keep the default settings. Click Next.

6.1.1.9 Lab – Install Third-Party Software in Windows 8 Answers 06
- The Ready to Install window opens. Click Install.

6.1.1.9 Lab – Install Third-Party Software in Windows 8 Answers 07
- The Installing progress window opens.

6.1.1.9 Lab – Install Third-Party Software in Windows 8 Answers 08
- If an information window opens, click OK.

6.1.1.9 Lab – Install Third-Party Software in Windows 8 Answers 09
- The Completing the Cisco Packet Tracer 6.2 Setup Wizard window opens. Click Finish.

6.1.1.9 Lab – Install Third-Party Software in Windows 8 Answers 10
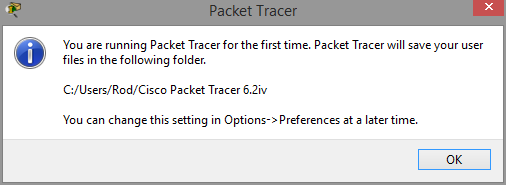
- If the You are running Packet Tracer for the first time window appears, click OK.
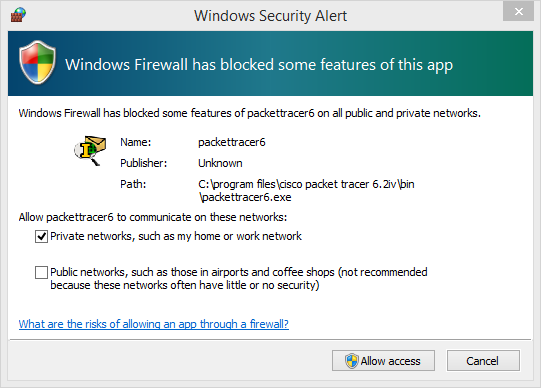
- If the Windows Security Alert window opens, click Allow access.
- Packet Tracer starts. Close Packet Tracer and all other open windows.
Step 3: Uninstalling Packet Tracer
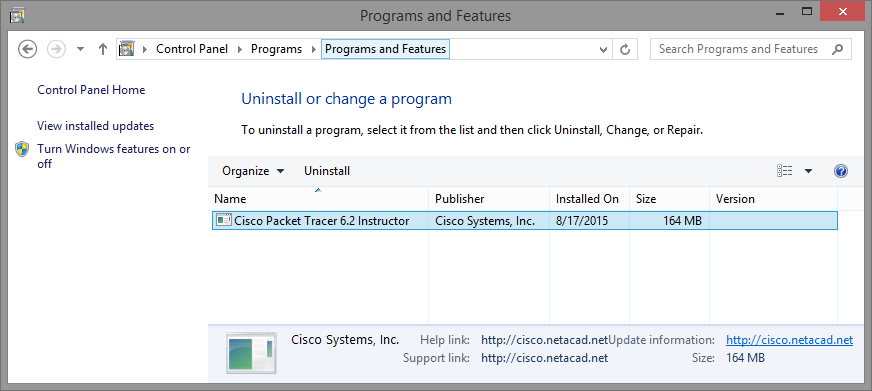
- To uninstall a program, click Control Panel > Programs and Features. Choose Cisco Packet Tracer in the list and click Uninstall.
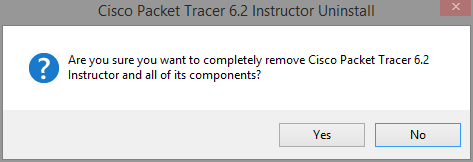
- The Cisco Packet Tracer 6.2 Uninstall window opens. Click Yes to confirm the removal.
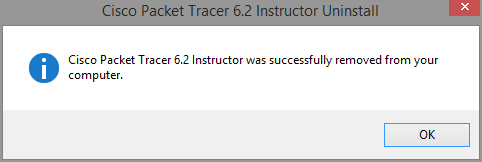
- When the successfully removed from your computer message opens, click OK.
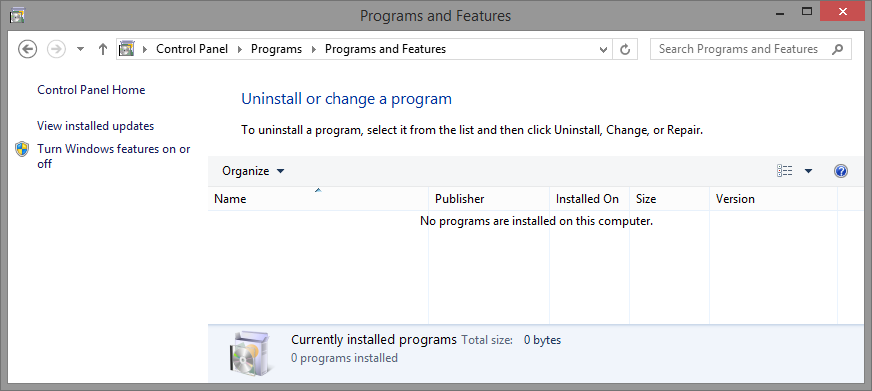
- Verify the application was removed. After the application removal process, the Programs and Features window no longer show Cisco Packet Tracer in the list. Close all open windows.
- Future activities in this course will require the use of Packet Tracer. Reinstall Packet Tracer
Reflection
Why does Microsoft recommend using Uninstall or change a program to remove an installed application?
_______________________________________________________________________________________
_______________________________________________________________________________________
_______________________________________________________________________________________
Sometimes, the uninstall software does not fully remove all of the files and settings created by the application during installation. The Microsoft Windows Uninstall or change a program utility removes the application completely.