Last Updated on November 7, 2018 by Admin
12.3.1.3 Lab – Configure Data Backup and Recovery in Windows 7 and Vista Answers
Lab – Configure Data Backup and Recovery in Windows 7 and Vista (Answers Version)
Introduction
In this lab, you will back up data. You will also perform a recovery of the data.
Recommended Equipment
- A computer with Windows 7 or Vista installed.
Answers Note: You will need to provide students with a means to backup data. Backing up files can be done at the following locations: any internal or external hard drive, USB flash drive, writeable DVDs and CDs, and network locations.
Part 1: Data Backup and Recovery in Windows 7
Step 1: Create back up files.
- Log on to the computer as an administrator.
- Create a text file on the desktop called Backup File One. Open the file and type the text “The text in this file will not be changed.”
- Create another text file on the desktop called Backup File Two. Open the file and type the text “The text in this file will be changed.”
Note: Remove all extra folders and files from the computers Desktop. This will help to reduce the length of time to complete the backup for this lab.
Step 2: Open the Backup and Restore tool
- To open Backup and Restore in Windows 7, use the following path:
Control Panel > Backup and Restore
In Vista, use the following path:
Control Panel > Backup and Restore Center - If backup has never been configured, your window will look like the following:
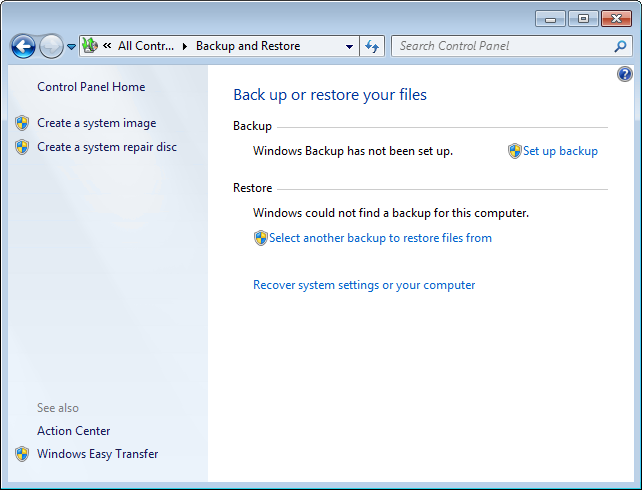
12.3.1.3 Lab – Configure Data Backup and Recovery in Windows 7 and Vista Answers 01
- If a backup is scheduled to run, click Turn off schedule, as shown below.
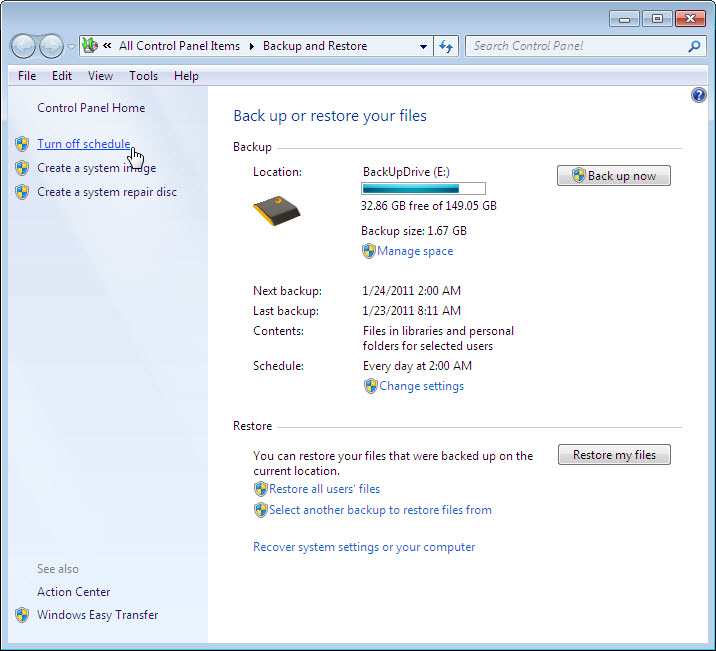
12.3.1.3 Lab – Configure Data Backup and Recovery in Windows 7 and Vista Answers 02
Step 3: Complete the Set up backup wizard.
- If a backup method is already configured, click Change settings, as shown below, to start the Set up backup wizard. If a backup has never been configured, click Set up backup to start the wizard.
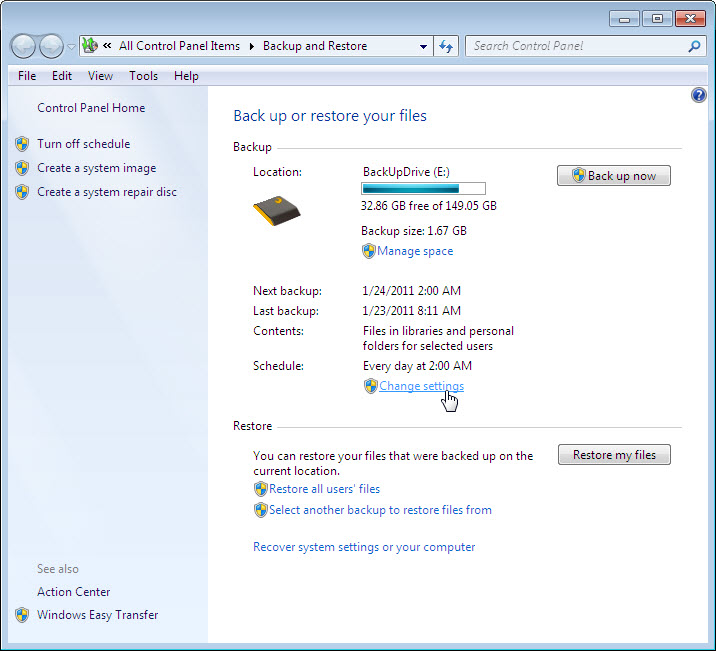
12.3.1.3 Lab – Configure Data Backup and Recovery in Windows 7 and Vista Answers 03
- Select the location where the backup will be stored. In this example, an external hard drive is used. Click Next.
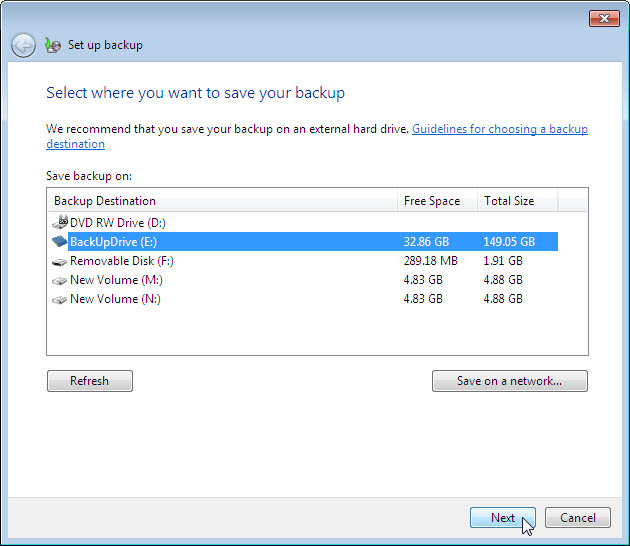
12.3.1.3 Lab – Configure Data Backup and Recovery in Windows 7 and Vista Answers 04
- Select Let me choose on the What do you want to back up? screen. Click Next.
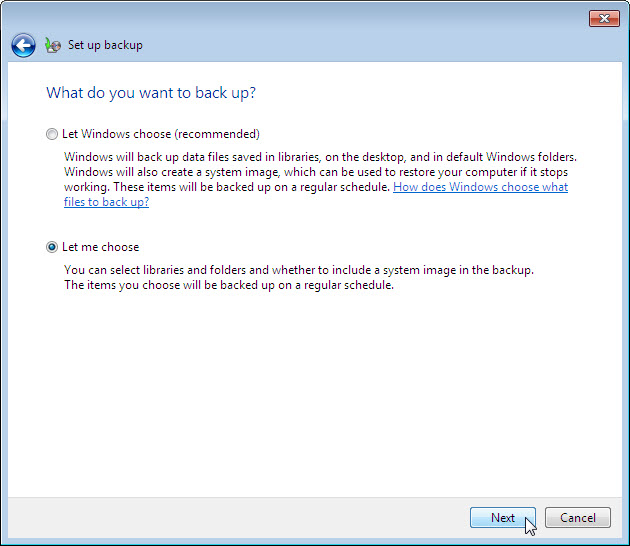
12.3.1.3 Lab – Configure Data Backup and Recovery in Windows 7 and Vista Answers 05
- Expand the current user account so you can view the different libraries that you can bac kup. Click What files are excluded by default from the backup? and list the excluded files.
____________________________________________________________________________________
____________________________________________________________________________________
____________________________________________________________________________________
Program files, files stored on a FAT file system, Files in the Recycle Bin, and Temporary files on a drive smaller than 1GB.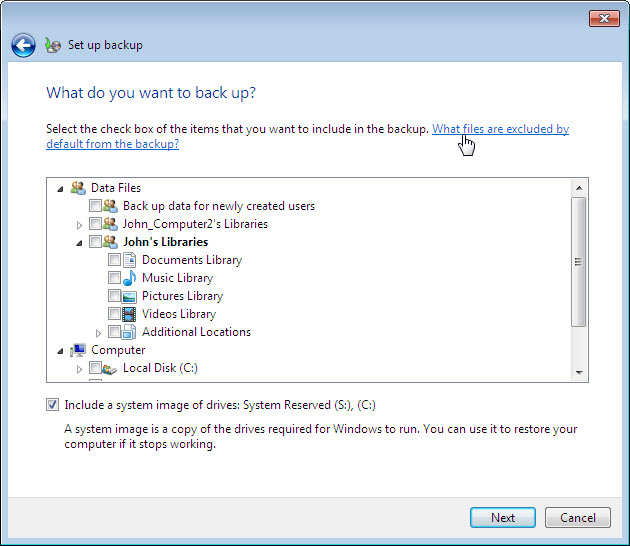
12.3.1.3 Lab – Configure Data Backup and Recovery in Windows 7 and Vista Answers 06
- Close the Windows Help and Support window. Expand Additional Locations and make sure only Desktop is selected. Make sure no other location is selected. Remove the check mark from Include a system image of drives:. Click Next.
- The Review your backup settings screen is displayed. Click Change schedule.
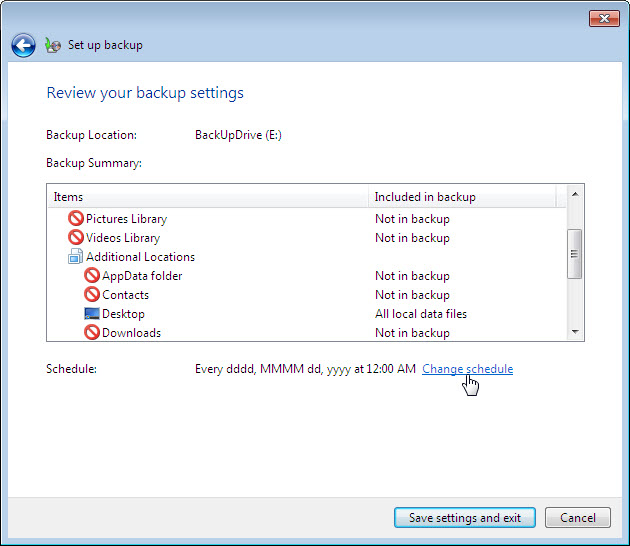
12.3.1.3 Lab – Configure Data Backup and Recovery in Windows 7 and Vista Answers 07
- The How often do you want to back up? screen is displayed. Place a check mark in the checkbox Run backup on a schedule (recommended). Set the following conditions and then click OK.
How often: Daily
What day: blank
What time: 2:00 AM
Which files will be backed up?
____________________________________________________________________________________
New files that have been added to the Desktop and existing Desktop files that have been changed.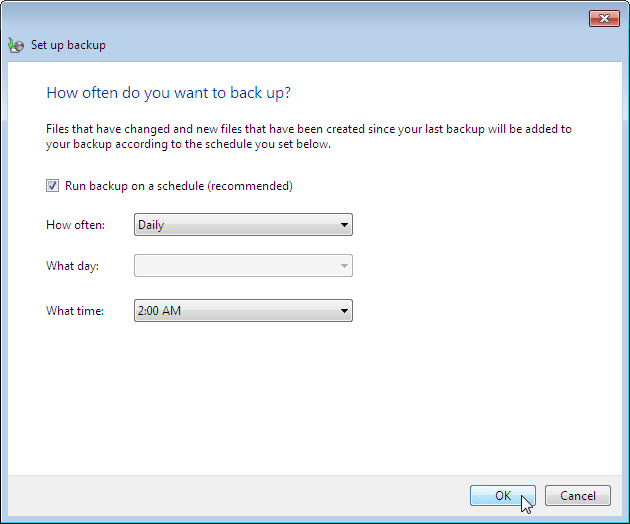
12.3.1.3 Lab – Configure Data Backup and Recovery in Windows 7 and Vista Answers 08
- The Review your backup settings screen is displayed. Click Save settings and exit.
Note: If a backup schedule has never been created, then the button label is Save settings and run backup. Clicking the button will immediately start the backup process. If this is the case, move to Step 4b.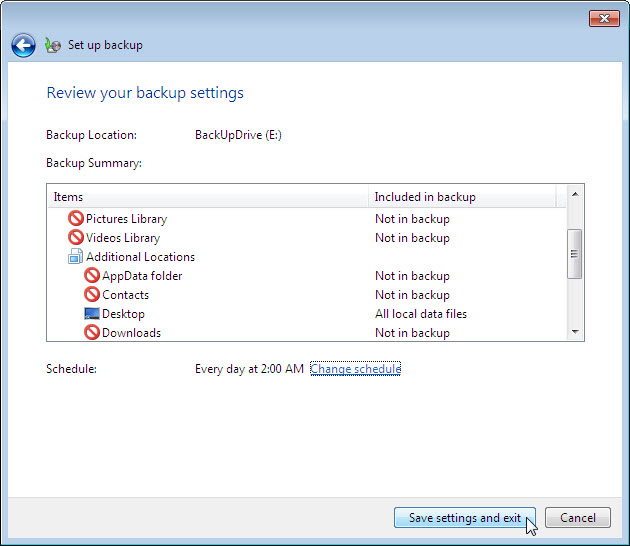
12.3.1.3 Lab – Configure Data Backup and Recovery in Windows 7 and Vista Answers 09
Step 4: Run the backup.
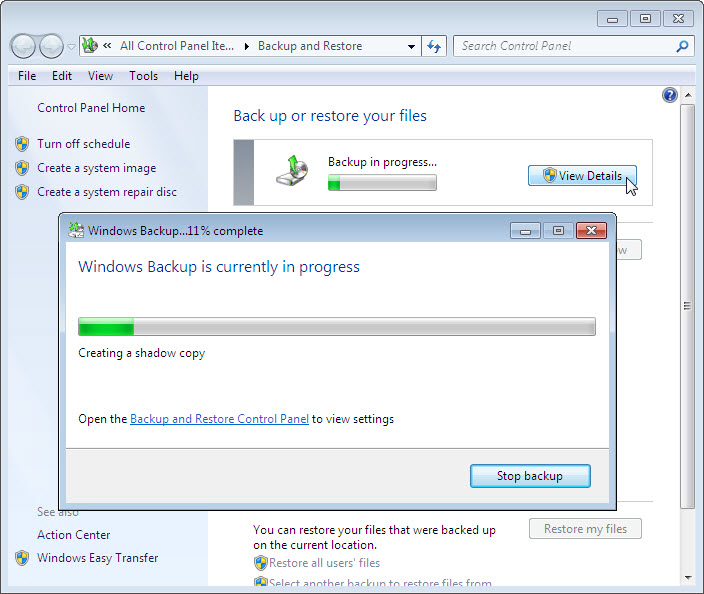
- To test the backup configuration, click Back up now. To view the progress of the backup, click View Details. The Windows Backup is currently in progress screen is displayed.
12.3.1.3 Lab – Configure Data Backup and Recovery in Windows 7 and Vista Answers 11
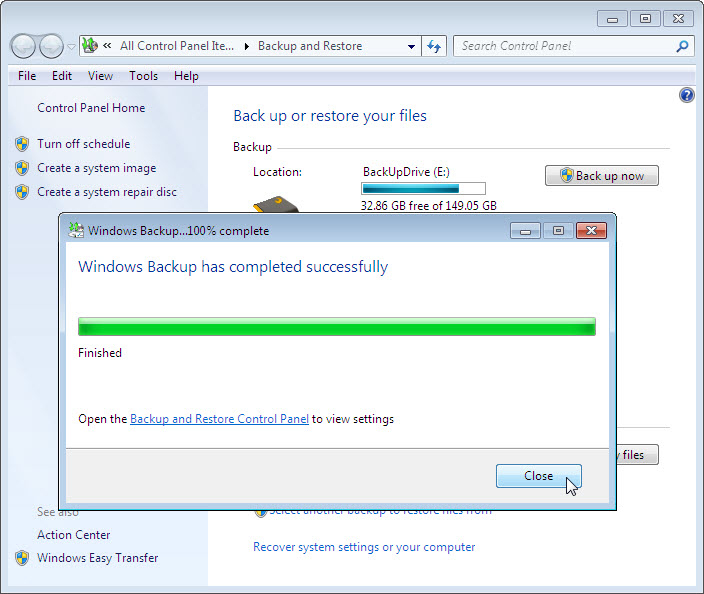
- When the Windows Backup has completed successfully message appears, click Close.
12.3.1.3 Lab – Configure Data Backup and Recovery in Windows 7 and Vista Answers 12
- Review the information beneath the Backup section of the Backup and Restore window. When will the next backup take place?
____________________________________________________________________________________
Answers will vary; 1/24/2011 2:00 AM
What is the state of the schedule, on or off?
On
Step 5: Delete and restore files.
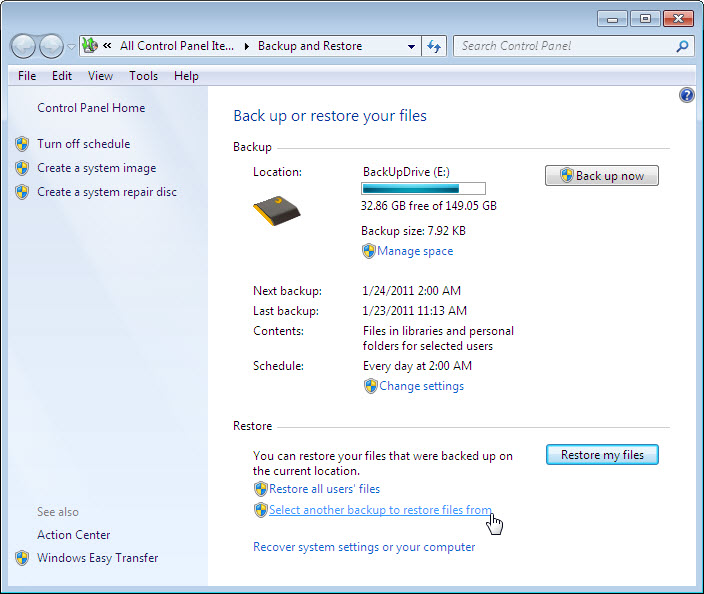
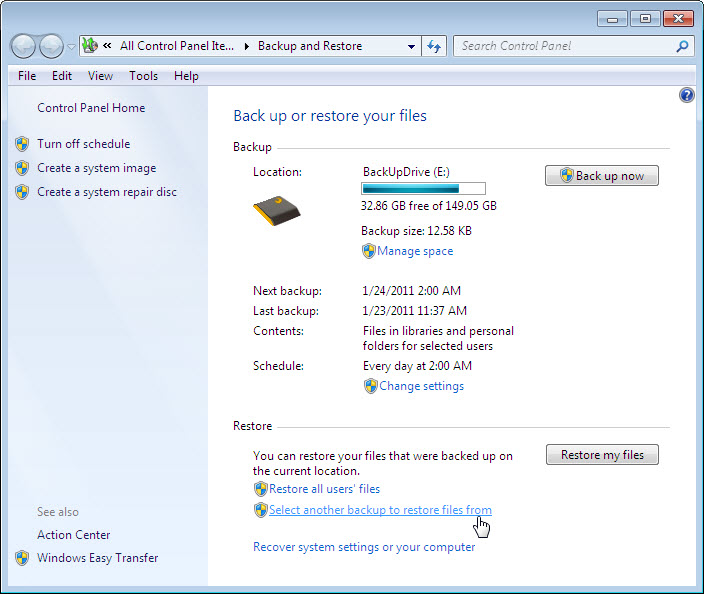
- Navigate to the Desktop and delete Backup File One and Backup File Two. Empty the Recycle Bin. In the Backup and Restore window, click Select another backup to restore files from.
12.3.1.3 Lab – Configure Data Backup and Recovery in Windows 7 and Vista Answers 13
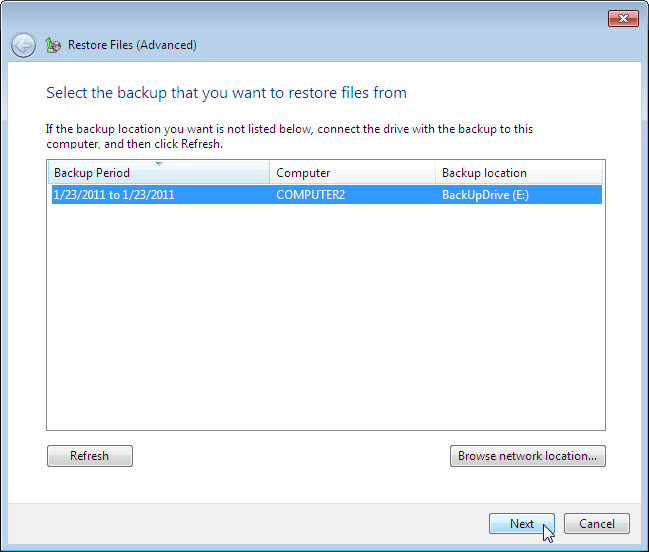
- The Select the backup that you want to restore files from screen is displayed. Select the location where the files are stored. Click Next.
12.3.1.3 Lab – Configure Data Backup and Recovery in Windows 7 and Vista Answers 14
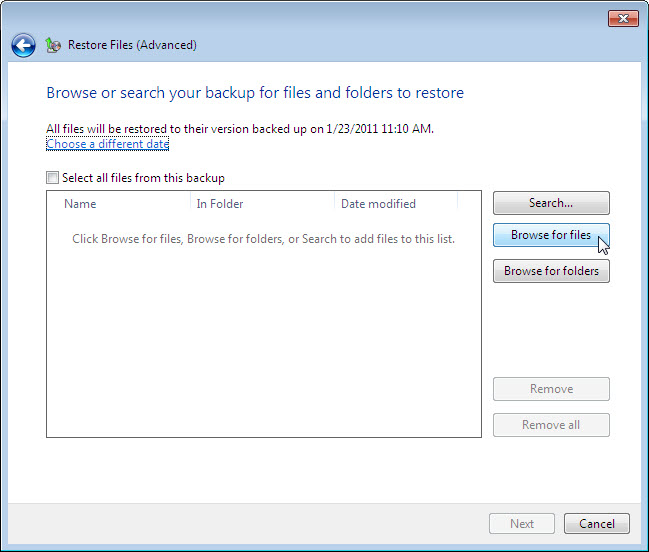
- The Browse or search your backup for files and folders to restore screen is displayed. Click Browse for files.
12.3.1.3 Lab – Configure Data Backup and Recovery in Windows 7 and Vista Answers 15
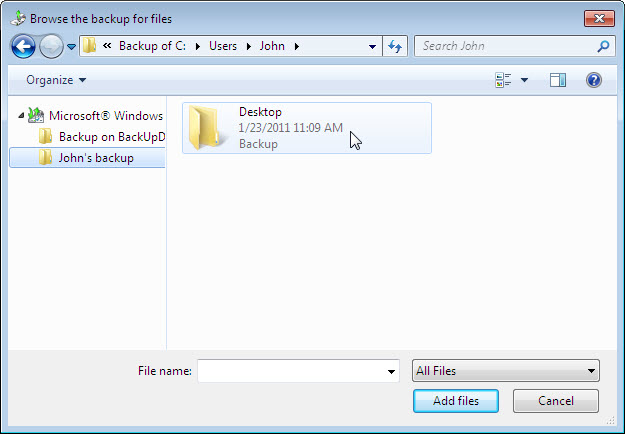
- The Browse the backup for files window opens. Click the current user’s backup. In the example, this user is John. Therefore, the folder is labeled John’s backup. Double-click Desktop and locate files Backup File One and Backup File Two. Select both files by clicking Backup File One and then holding down the Ctrl key while clicking Backup File Two. Click Add files.
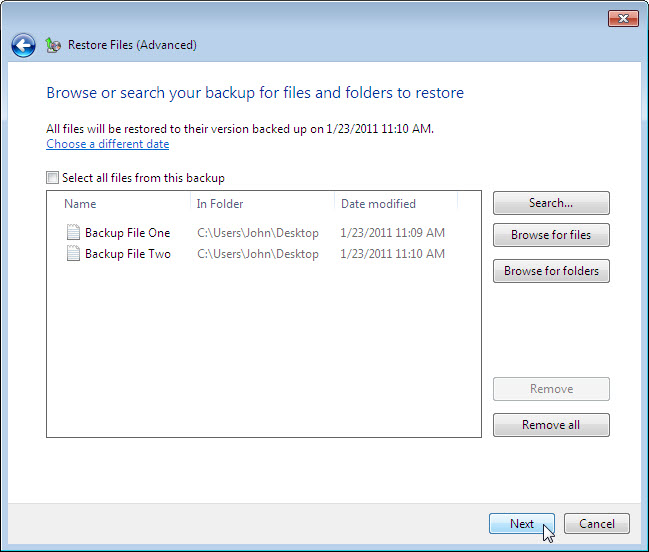
- The two files are listed in the Browse or search your backup for files and folders to restore screen. Click Next.
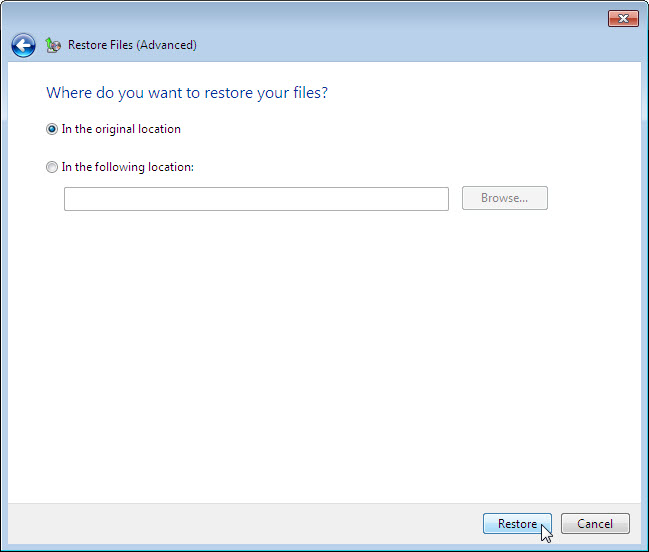
- The Where do you want to save the restored files? screen is displayed. Select In the original location, and then click Restore.
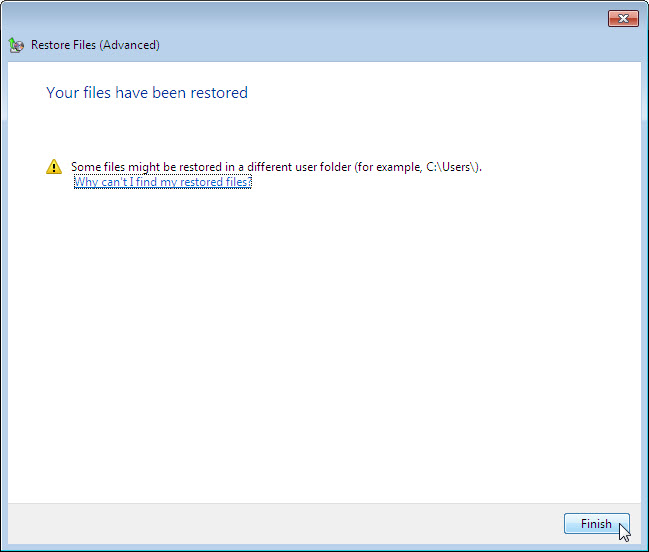
- The Your files have been restored screen is displayed. Click Finish.
- Navigate to the Desktop. Are the two files restored to the Desktop?_________________________________
Yes
Step 6: Modify, back up, delete, and restore a file.
- Open file Backup File Two. Add the following text “More text added.” to the file. Save the file.
- Click the Backup and Restore window so it is active. Click Back up now.
- Navigate to the Desktop. Delete Backup File Two. Empty the Recycle Bin. Click on the Backup and Restore window so it is activated. Click Select another backup to restore files from.
- Select the location where the files are stored and then repeat Step 5:
Next > Browse for files > User’s backup > Desktop - Restore Backup File Two. Navigate to the Desktop. Open file Backup File Two. What text is in the file?____________________________________________________________________________________
The text in this file will be changed. More text added.
Part 2: Backup and Data Recovery in Windows Vista
Step 1: Create back up files.
- Log on to the computer as an administrator.
- Create a text file on the desktop called Backup File One. Open the file and type the text “The text in this file will not be changed.”
- Create another text file on the desktop called Backup File Two. Open the file and type the text “The text in this file will be changed.”
Note: Remove all extra folders and files from the computer’s Desktop. This will help to reduce the length of time to complete the backup for this lab.
Step 2: Open the Backup Status and Configuration tool.
- To open the Backup Status and Configuration tool in Windows Vista, use the following path:
Start > All Programs > Accessories > System Tools > Backup Status and Configuration - If backup has never been configured, your window will look like the following:
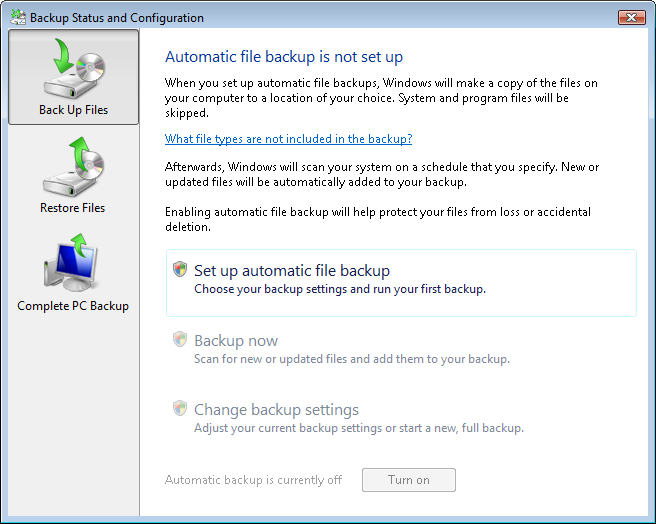
- If a backup is scheduled to run, click Turn off, as shown below.
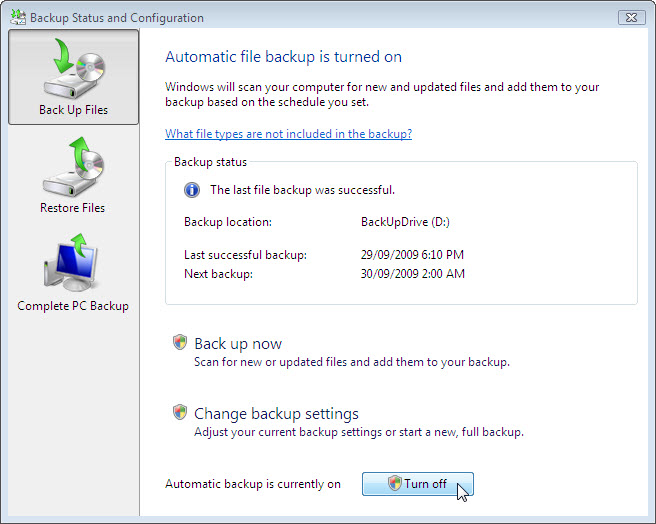
Step 3: Complete the Back Up Files wizard.
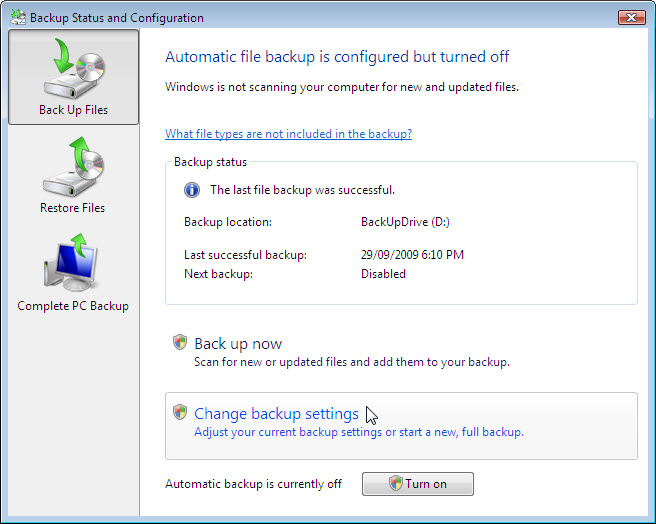
- If a backup is already configured, click Change backup settings > Continue. If a backup configuration does not exist, click Setup automatic file backup > Continue.
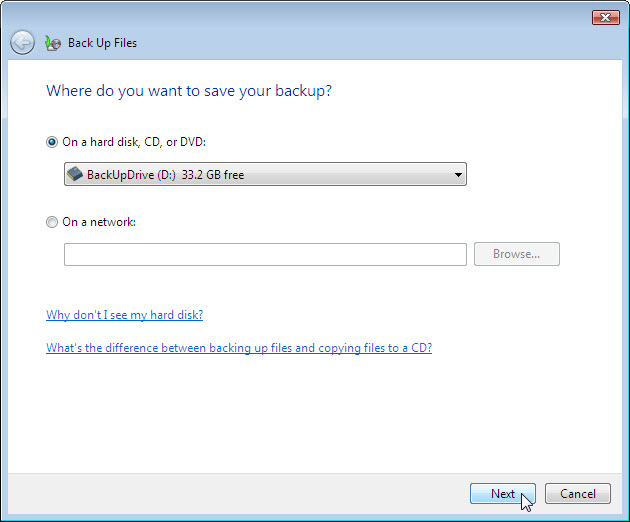
- The Where do you want to save your backup? screen is displayed. Select the location where the backup will be stored. In this example, an external hard drive is used. Click Next.
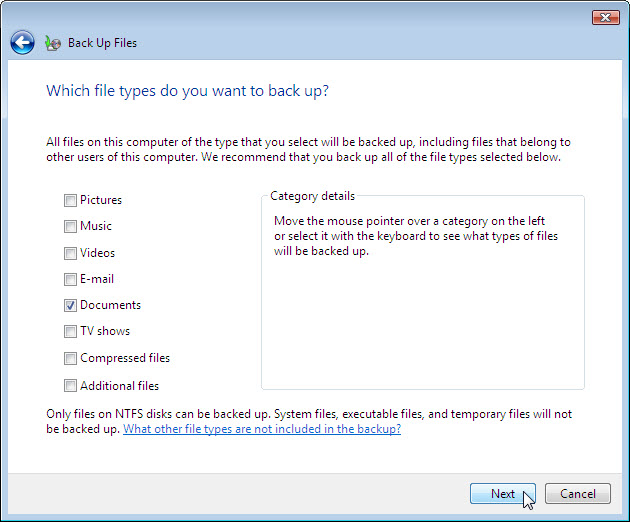
- The Which file types do you want to back up? screen is displayed. Answer the following questions:
What file type can be backed up?
____________________________________________________________________________________
Picture, Music, Video, E-mail, Documents, TV shows, Compressed files, Additional files.
What file types will not be backed up?
____________________________________________________________________________________
System, Executable, Temporary.
Only files on what type of disk can be backed up?____________________________________________________________________________________
NTFS. - Select the file type Documents. Click Next.
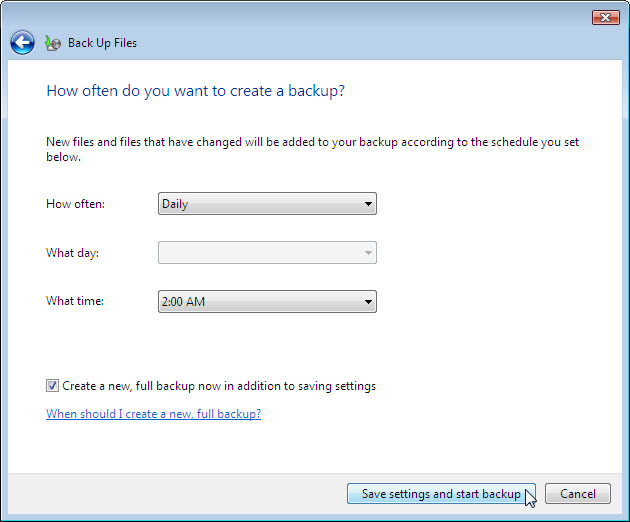
- The How often do you want to create a backup? screen is displayed. Set the following conditions:
How often: Daily
What day: blank
What time: 2:00 AM
Which files will be backed up?
____________________________________________________________________________________
New files and files that have been changed. - Place a check mark in the checkbox Create a new, full backup now in addition to saving settings. Click Save settings and start backup.
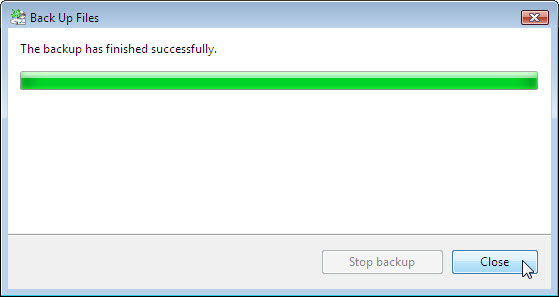
- The Creating a shadow copy progress screen is displayed. When the backup is done, The backup has finished successfully screen is displayed. Click Close to finish the Back Up Files wizard.
- The Backup Status and Configuration window opens. Answer the following questions:
When will the next backup take place?
____________________________________________________________________________________
Answers may vary; 30/09/2009 2:00 AM _________________________________________
What is the state of automatic backup? On or Off?
On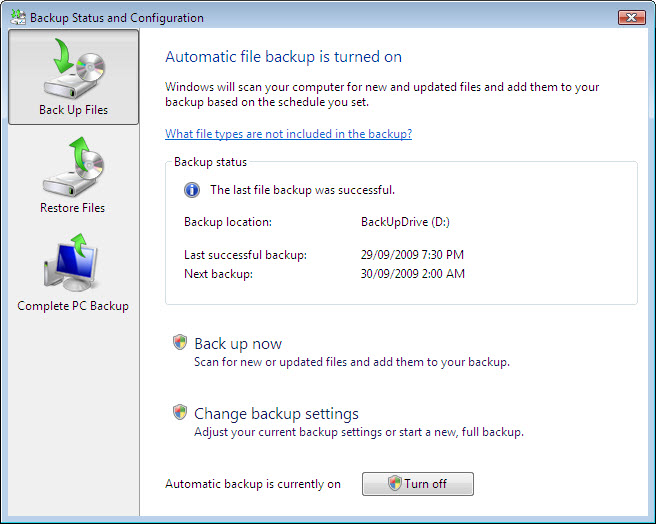
Step 4: Delete and restore files.
- Navigate to the Desktop. Delete Backup File One and Backup File Two. Empty the Recycle Bin.
- In the Backup Status and Configuration, click Restore Files in the left panel. Click Restore Files in the main window, as shown below.
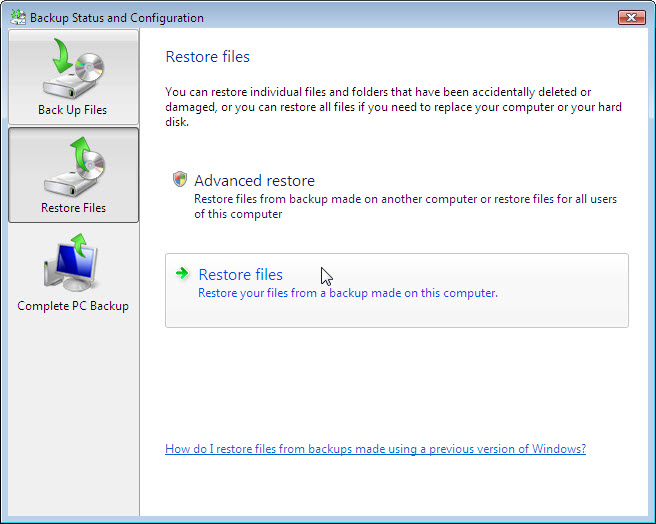
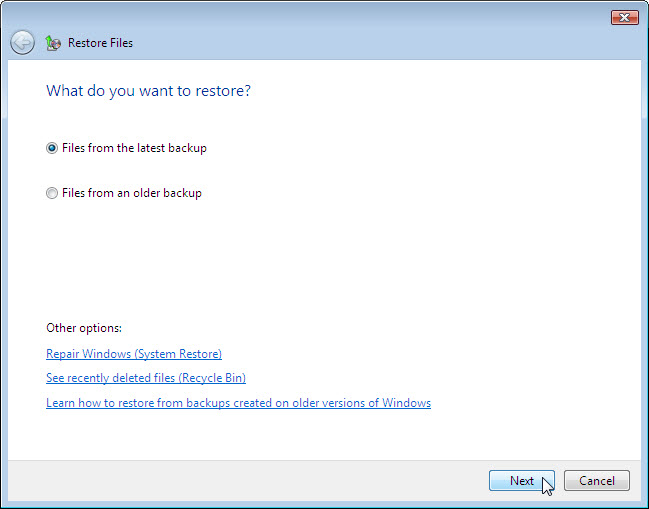
- The Restore Files wizard starts and the What do you want to restore? screen is displayed. Select Files from the latest backup. Click Next.
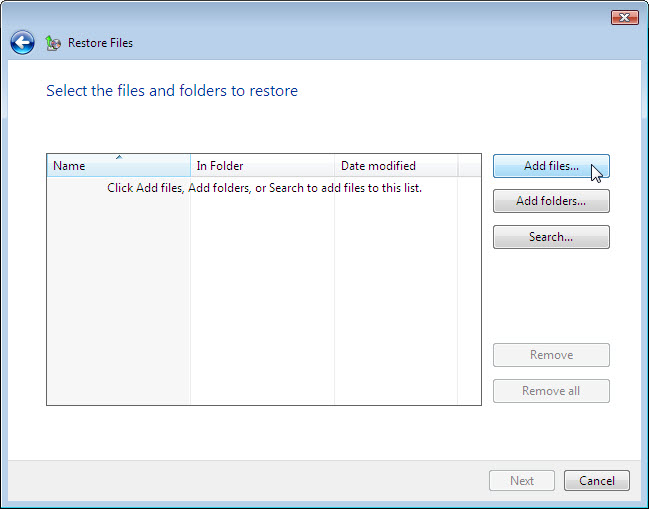
- The Select the files and folders to restore screen is displayed. Click Add files…, and then navigate to the Desktop to locate files Backup File One and Backup File Two.
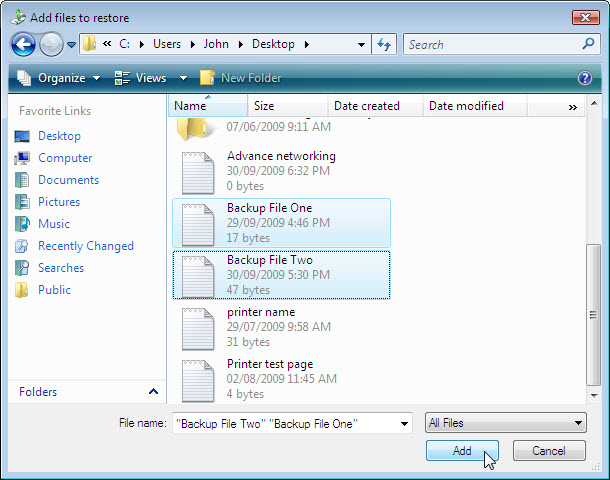
- Select both files by clicking Backup File One and then holding down the Ctrl key while clicking Backup File Two. Click Add.
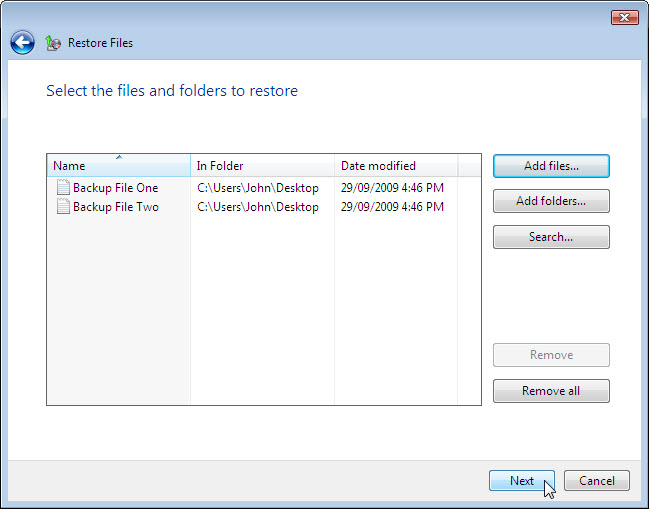
- The two files should show up in the Select the files and folders to restore screen. Click Next.
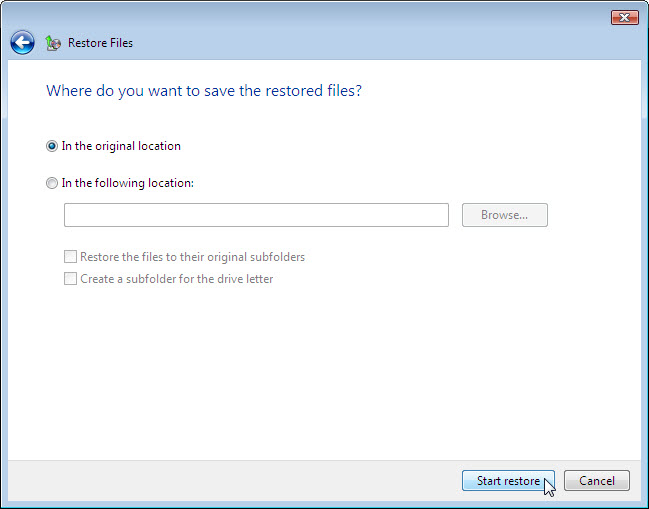
- The Where do you want to save the restored files? screen is displayed. Select In the original location. Click Start restore.
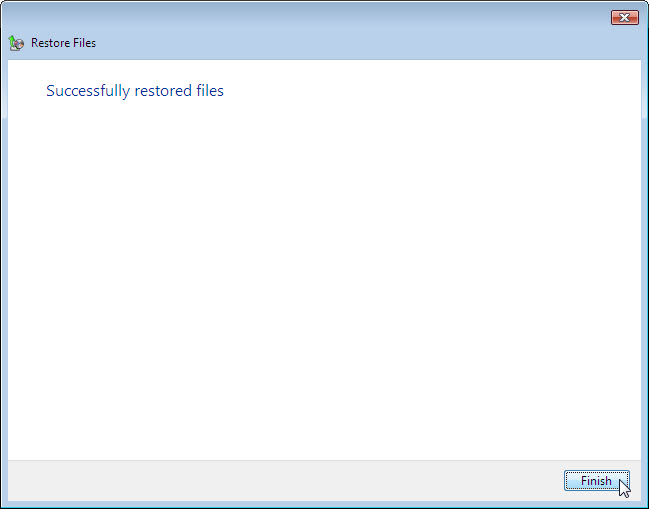
- When the Successfully restored files screen is displayed, click Finish.
- To verify that the files are restored, navigate to the Desktop. Are the two files restored to the Desktop?____________________________________________________________________________________
Yes.
Step 5: Modify, back up, delete, and restore a file.
- Open file Backup File Two. Add the following text “More text added.” to the file. Save the file.
- Click Backup Status and Configuration, and the click Back Up Files.
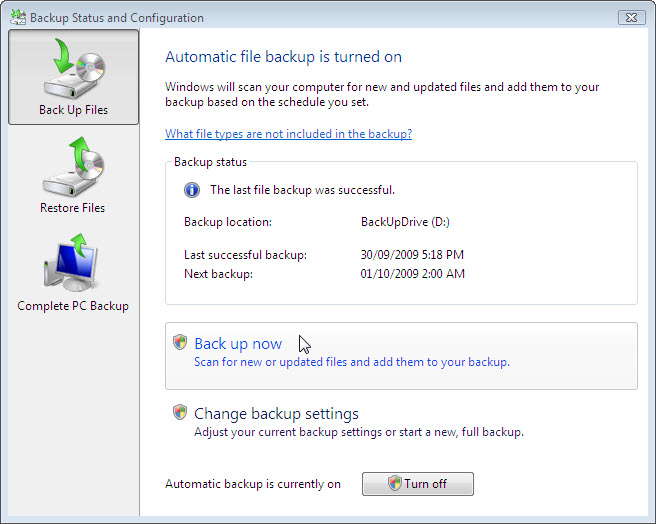
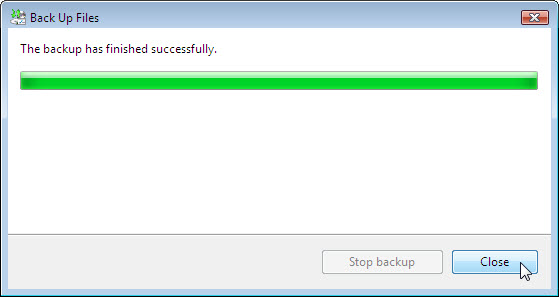
- Click Back up now > Continue. The progress bar opens. When the backup is complete click Close.
- Navigate to the Desktop. Delete Backup File Two. Empty the Recycle Bin.
- Click Backup Status and Configuration. Click Restore Files from the left panel. Click Restore files in the main window.
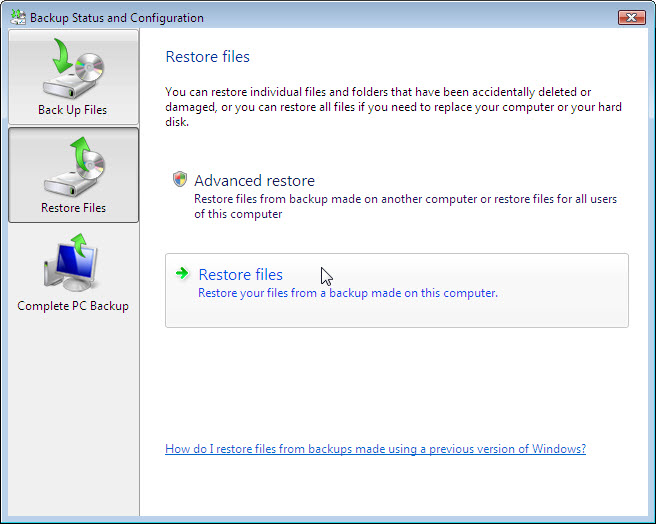
- Restore Backup File Two. Navigate to the Desktop. Open file Backup File Two. What text is in the file?____________________________________________________________________________________
The text in this file will be changed. More text added.