Last Updated on November 6, 2018 by Admin
11.3.2.5 Lab – Share a Printer in Windows 7 and Vista Answers
Lab – Share a Printer in Windows 7 and Vista (Answers Version)
Introduction
In this lab, you will share a printer, configure the printer on a networked computer, and print a test page from the remote computer.
Recommended Equipment
- Two computers directly connected or connected through a switch
- Windows 7 or Vista installed on both computers
- A printer installed on one of the computers
Part 1: Windows 7
Step 1: Share the printer.
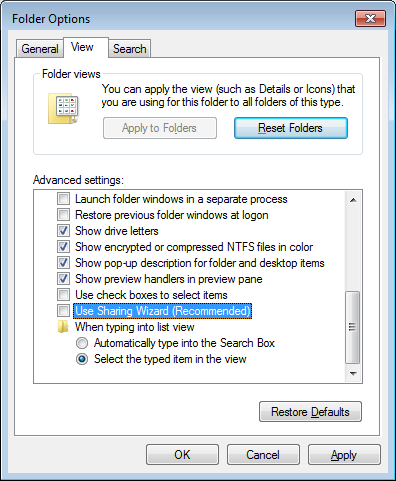
- Log on to the computer that has the printer connected. To access the folder options, click Control Panel > Folder Options. In the View tab, deselect Use Sharing Wizard (Recommended). Click OK to continue.
11.3.2.5 Lab – Share a Printer in Windows 7 and Vista Answers 01
- Click Control Panel > Network and Sharing Center > Change advanced sharing settings on the left side panel.
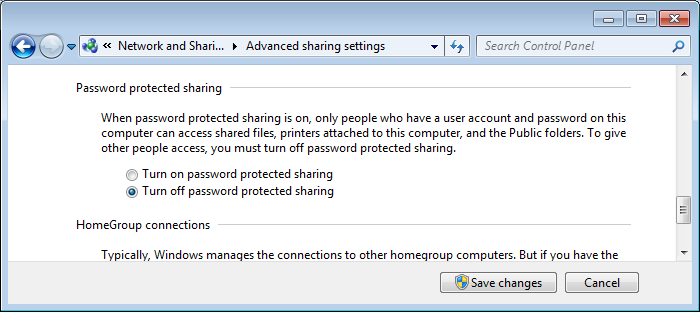
- In the Change sharing options for different network profiles screen, scroll down to Password protected sharing for the current profile. Select Turn off password protected sharing and click Save changes.
11.3.2.5 Lab – Share a Printer in Windows 7 and Vista Answers 02
- Click Control Panel > Devices and Printers.
- Right-click the printer > Printer properties.
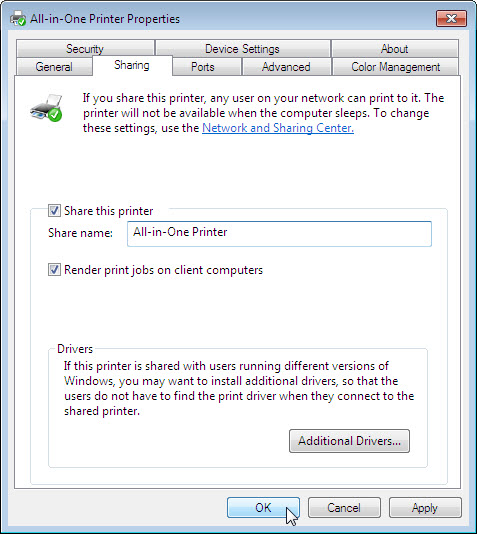
- In the Sharing tab, select Share this printer. Name the new share All-in-One Printer and click OK.
11.3.2.5 Lab – Share a Printer in Windows 7 and Vista Answers 03
Step 2: Add a shared printer.
- Log on to the computer that does not have the printer connected.
- Click Control Panel > Devices and Printers.
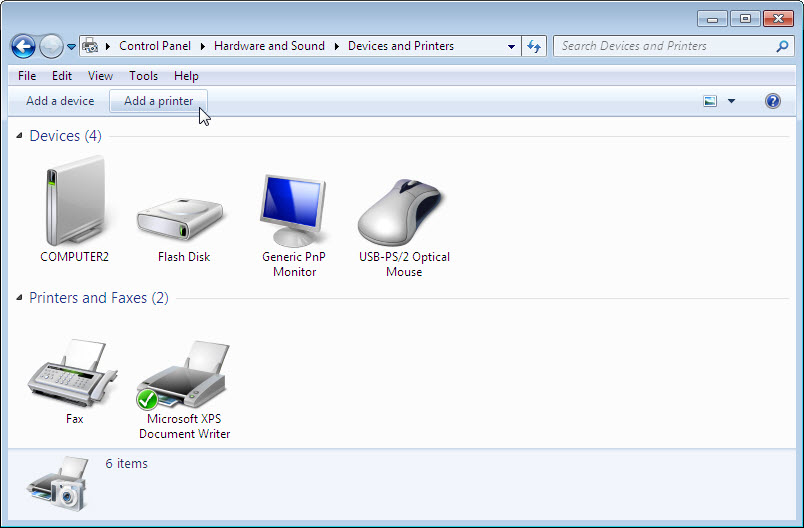
- In the Devices and Printers window, click Add a printer.
11.3.2.5 Lab – Share a Printer in Windows 7 and Vista Answers 04
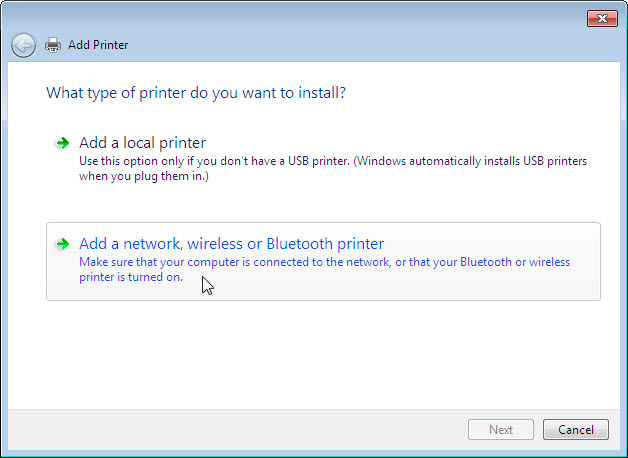
- Click Add a network, wireless or Bluetooth printer.
11.3.2.5 Lab – Share a Printer in Windows 7 and Vista Answers 05
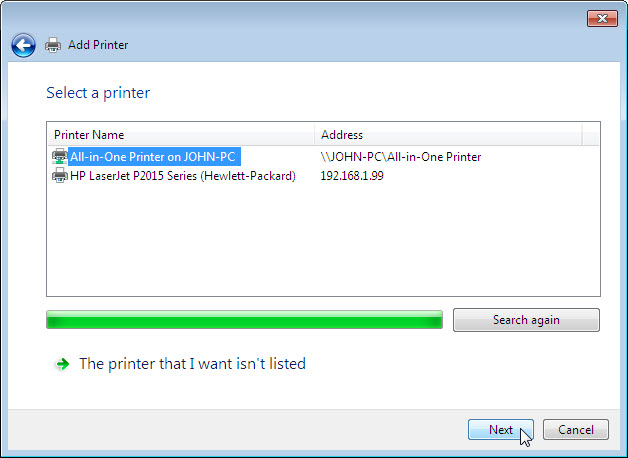
- The Searching for available Printers screen appears. When all printers are discovered, select Printer name on ComputerName in the Select a printer screen and click Next.
11.3.2.5 Lab – Share a Printer in Windows 7 and Vista Answers 06
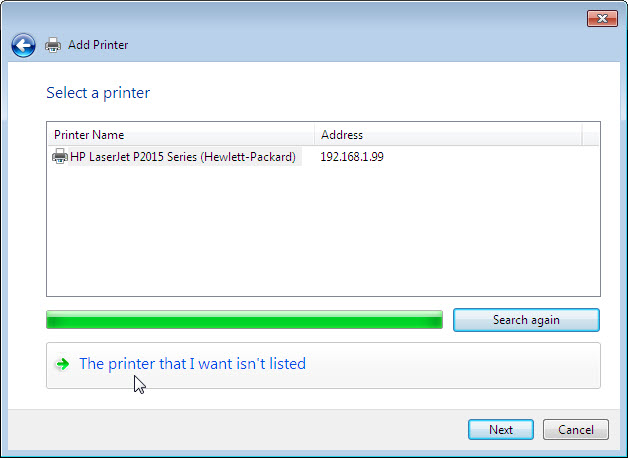
- To find a printer by name or TCP/IP address, select The printer that I want isn’t listed.
11.3.2.5 Lab – Share a Printer in Windows 7 and Vista Answers 07
- Click Select a shared printer by name and type \\computername\printer, where computername is the name of the computer with the connected printer and printer is the name of the printer. Click Next.
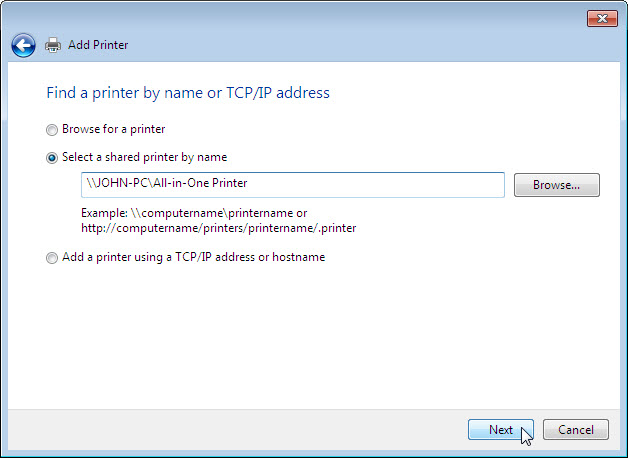
11.3.2.5 Lab – Share a Printer in Windows 7 and Vista Answers 08
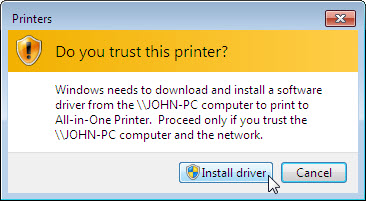
- If prompted to install drivers, click Install driver.
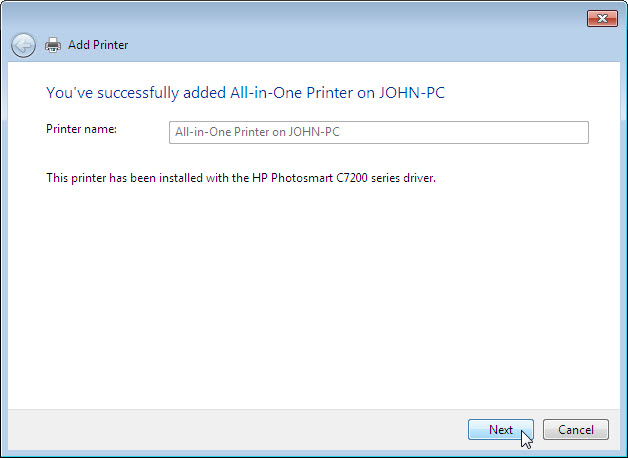
- When the You’ve successfully added a printer screen appears, click Next and Finish to close the Add Printer window.
Step 3: Print a test page.
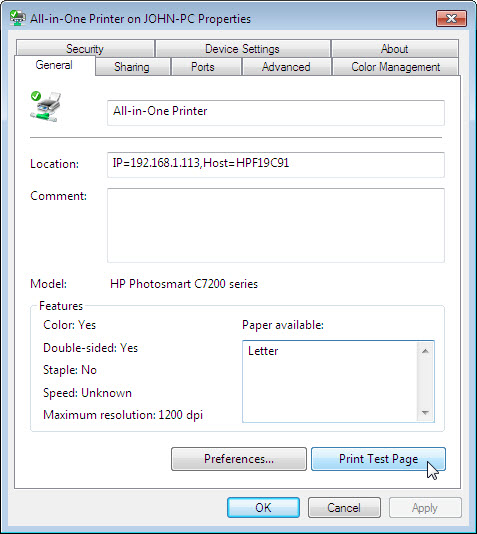
- In the Devices and Printers window, right-click the printer > Printer properties.
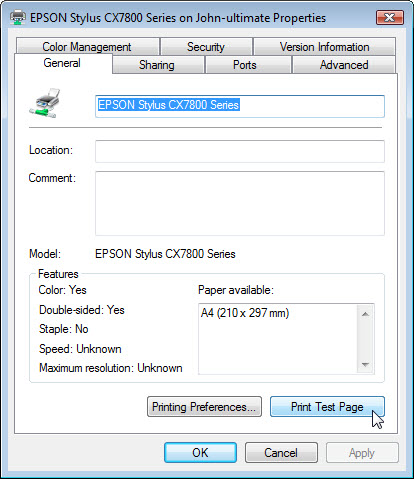
- In the General tab, click Print Test Page to verify that the printer is working properly.
Part 2: Windows Vista
Step 1: Share the printer.
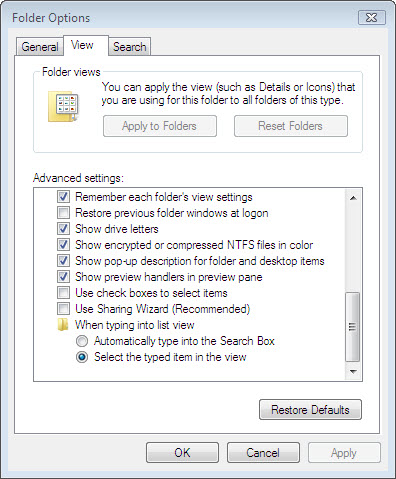
- Log on to the computer that has the printer connected. To access the folder options, click Control Panel > Folder Options. In the View tab, deselect Use Sharing Wizard (Recommended) and click OK to continue.
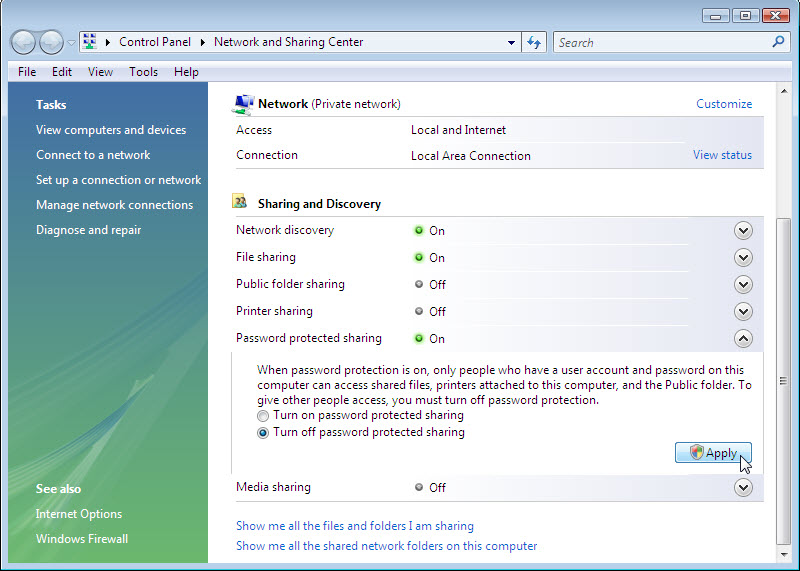
- Click Control Panel > Network and Sharing Center > Password protected sharing. Select Turn off password protected sharing and click Apply.
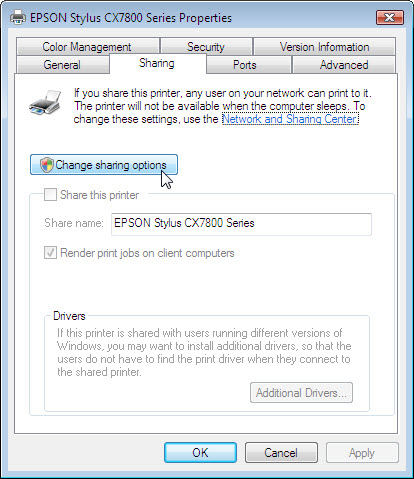
- Click Control Panel > Printers. Right-click the printer > Properties.
- In the Sharing tab, click Change sharing options.
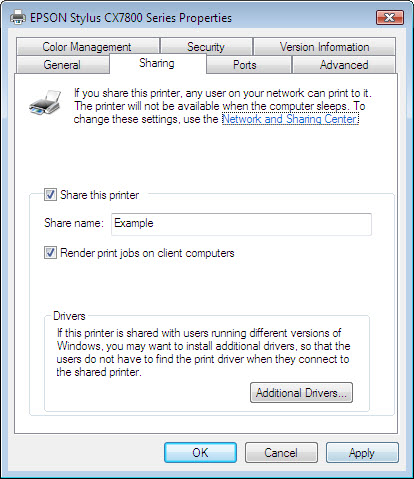
- Select Share this printer. Name the new share Example and click OK.
Step 2: Add a shared printer.
- Log on to the computer that has no printer connected, and click Control Panel > Printers. Click Add a printer.
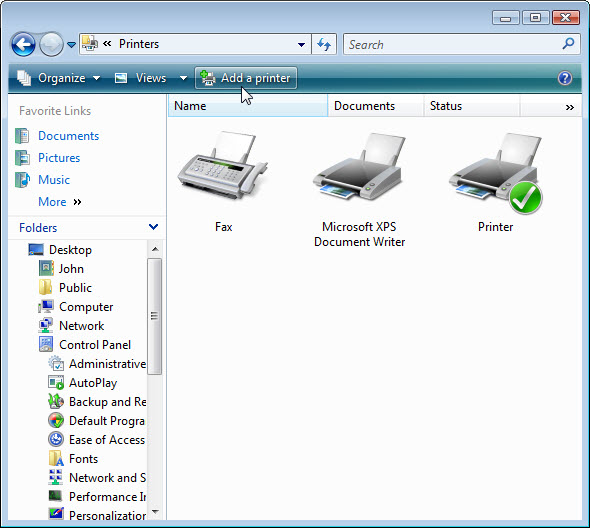
- In the Add Printer screen, click Add a network, wireless or Bluetooth printer.
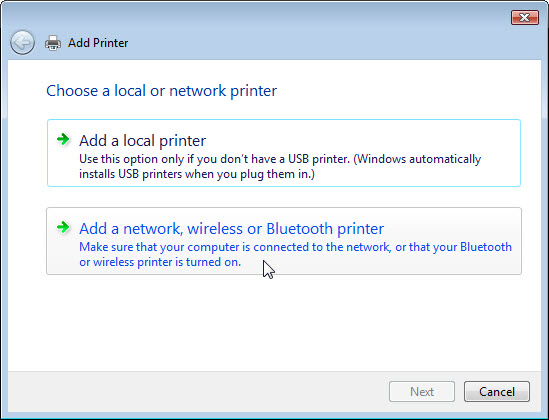
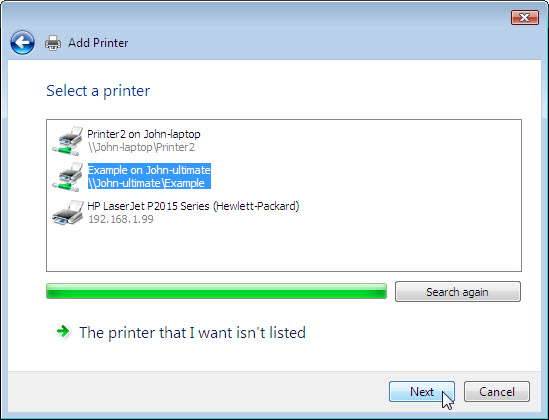
- When all printers are discovered, the Select a printer screen opens. If the desired printer is displayed in the search list, select Printer on Computername and click Next.
 Or to find a printer by name or TCP/IP address, select The printer that I want isn’t listed.
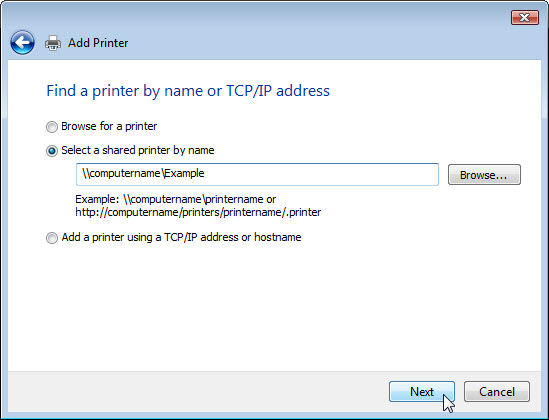
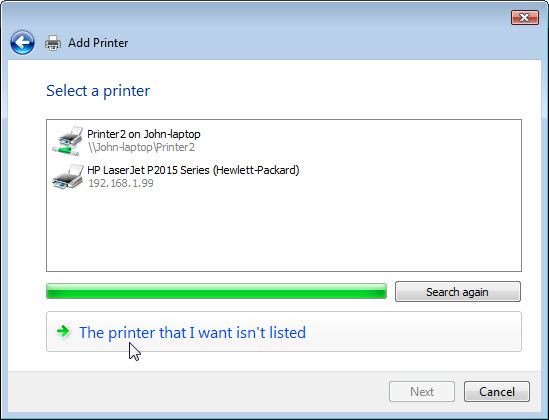 Select the radio button Select a shared printer by name and type \\computername\printer, where computername is the name of the computer with the connected printer and printer is the name of the printer. Click Next.
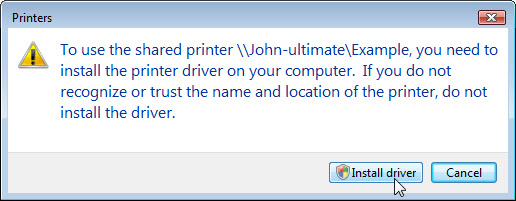
- If prompted to install drivers click Install driver.
- Accept all default settings, click Next and then click Finish.
Step 3: Print a test page.
- Click Control Panel > double-click Printers.
- Right-click the printer > Properties and click Print Test Page.
