Last Updated on October 29, 2018 by Admin
5.2.1.10 Lab – Check for Updates in Windows 7 and Vista Answers
Lab – Check for Updates in Windows 7 and Vista (Answers Version)
Introduction
In this lab, you will configure the operating system so you can select which updates are installed and then change the settings so updates are downloaded and installed automatically.
Recommended Equipment
The following equipment is required for this exercise:
- A computer with a new installation of Windows 7 or Vista
Step 1: Check for updates on your computer.
- Boot the computer. Navigate to the Change Settings window by clicking Control Panel > Windows Update > Change settings.

5.2.1.10 Lab – Check for Updates in Windows 7 and Vista Answers 01
- In the Important updates drop-down menu, select Check for updates but let me choose whether to download and install them.

5.2.1.10 Lab – Check for Updates in Windows 7 and Vista Answers 02
- Click OK.
Step 2: Select updates to apply, and install the updates.
- From the Windows Update window, click the link that shows how many updates have been downloaded. Example: 16 important updates are available.

5.2.1.10 Lab – Check for Updates in Windows 7 and Vista Answers 03
Note: If no important updates are shown, click Check for updates.
- The Select update to install window opens. Place a check mark next to the important and optional updates to be installed, and click OK.
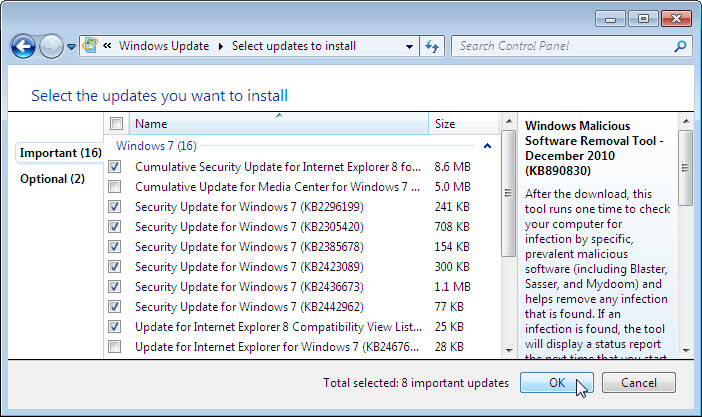
5.2.1.10 Lab – Check for Updates in Windows 7 and Vista Answers 04
Note: Before selecting which updates to be installed, ask the Answers for permission to install the updates.
- In the Windows Update window, click Install updates.

5.2.1.10 Lab – Check for Updates in Windows 7 and Vista Answers 05
- The Windows Update window will display the status of the update process. Once all of the selected updates have been installed, you may receive a message stating that a reboot is required. If you receive that message, reboot the computer.
Step 3: Open the Windows Update utility program. (Optional)
If you rebooted your computer, re-open the Windows Update window by clicking Control Panel > Windows Update > Change settings.
Step 4: Change the Windows Updates to install updates automatically.
- From the Windows Update window, click Change settings.

5.2.1.10 Lab – Check for Updates in Windows 7 and Vista Answers 06
- The Choose how Windows can install updates window opens. Select Install updates automatically (recommended) from the drop-down menu.

5.2.1.10 Lab – Check for Updates in Windows 7 and Vista Answers 07
- Click OK to accept the change.
- Close all open window.
Reflection
Why is it recommended to set important updates to install automatically?
_______________________________________________________________________________________
_______________________________________________________________________________________
_______________________________________________________________________________________
_______________________________________________________________________________________
Answers will vary. Windows provides updates to resolve operating system or application problems. Important updates indicate that the fix could be critical to the operation of the computer. By setting Windows to install important updates automatically, these problems will be resolved as quickly as possible.