Last Updated on February 12, 2019 by Admin
2.5.2.5 Lab – Authentication Authorization Accounting Answers
Lab – Authentication, Authorization, and Accounting (Answers Version)
Answers Note: Red font color or gray highlights indicate text that appears in the Answers copy only.
Objectives
- Given a scenario, select the appropriate authentication, authorization, or access control
- Install and configure security controls when performing account management, based on best practices
Part 1: Adding Groups, Users, and Passwords on a Linux System
Part 2: Verify Users, Groups, and Passwords
Part 3: Using Symbolic Permissions
Part 4: Absolute Permissions
Background / Scenario
You will be conducting host security practices using the Linux command line by performing the following tasks:
- Adding Groups, Users, and Passwords
- Verifying Groups, Users, and Passwords
- Setting Symbolic Permissions
- Setting Absolute Permissions
Required Resources
- PC with Ubuntu 16.0.4 LTS installed in a VirtualBox or VMware virtual machine.
Part 1: Adding Groups, Users, and Passwords on a Linux System
In this part, you will add users, groups, and passwords to the local host machine.
Step 1: Open a terminal window in Ubuntu.
- Log in to Ubuntu using the following credentials:
User: cisco
Password: password
- Click on the terminal icon to open a terminal.
Step 2: Escalate privileges to the root level by entering the sudo su command. Enter the password password when prompted.
cisco@ubuntu:~$ sudo su

Step 3: Add a new group named HR by entering the command groupadd HR.
root@ubuntu:/home/cisco# groupadd HR

Part 2: Verify Users, Groups, and Passwords
Step 1: Verify the new group has been added to the group file list by entering cat /etc/group.
root@ubuntu:/home/cisco# cat /etc/group
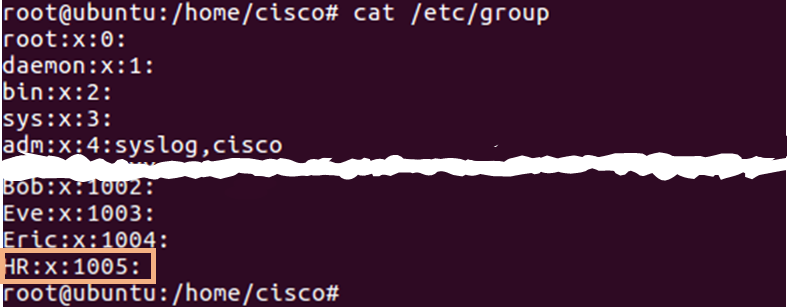
The new group HR will be added to the bottom of the /etc/group file with a group ID of 1005.
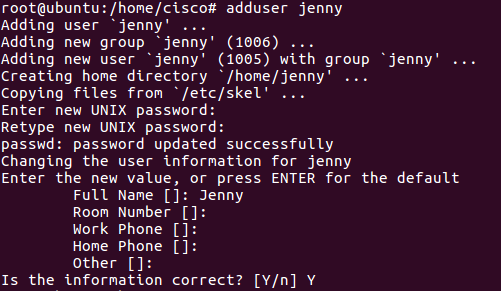
Step 2: Add a new user named jenny.
root@ubuntu:/home/cisco# adduser jenny
- When prompted for a new password, type lasocial. Press Enter.
- When prompted again, type lasocial. Press Enter.
- When prompted for a full name, type Jenny. Press Enter.
- For the rest of the configurations, press Enter until when asked is the information correct.
- Type Y for yes and press Enter.
Step 3: Place the user jenny in the HR group.
root@ubuntu:/home/cisco# usermod –G HR jenny

Step 4: Add another new user named joe.
root@ubuntu:/home/cisco# adduser joe
- When prompted for a new password, type tooth. Press Enter.
- When prompted again, type tooth. Press Enter.
- When prompted for a full name, type Joe. Press Enter.
- For the rest of the configurations, press Enter until when asked is the information correct.
- Type Y for yes and press Enter.
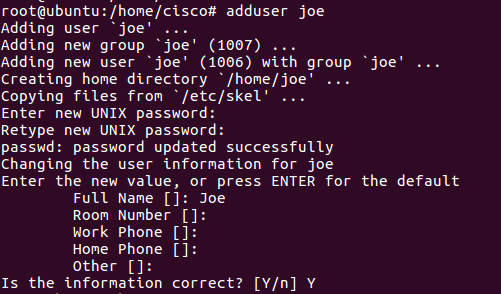
- Place the user joe in the HR group.\
root@ubuntu:/home/cisco# usermod –G HR joe
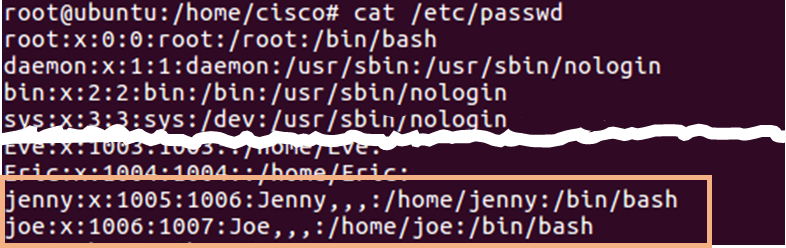
Step 5: Verify the newly created users in the passwd file.
root@ubuntu:/home/cisco# cat /etc/passwd
Step 6: View the created users in the shadow file.
root@ubuntu:/home/cisco# cat /etc/shadow
Part 3: Using Symbolic Permissions
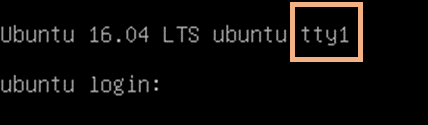
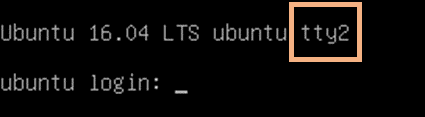
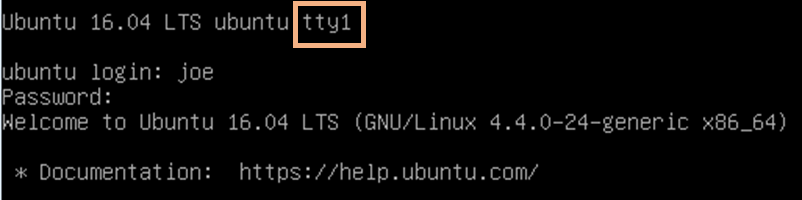
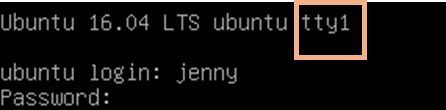
Step 1: While on the Ubuntu system, press and hold the keys CTRL+ALT+F1 until the screen changes to the tty1 Terminal.
Note: If you are unable to use tty1 terminal, return to graphical user interface (GUI) of the host by using CTRL+ALT+F7 and open a terminal window in the GUI Ubuntu OS. At the prompt, enter su –l jenny at the prompt and enter the password lasocial. Proceed to Step 4.
cisco@ubuntu:~$ su –l jenny

Note: If CTRL+ALT+F7 did not work, try CTRL+ALT+F8.
Step 2: Once on the Terminal login screen, type jenny and press Enter.
Step 3: When prompted for the password, type lasocial and press Enter.
Step 4: After a successful login, you will see the jenny@ubuntu:~$ prompt.
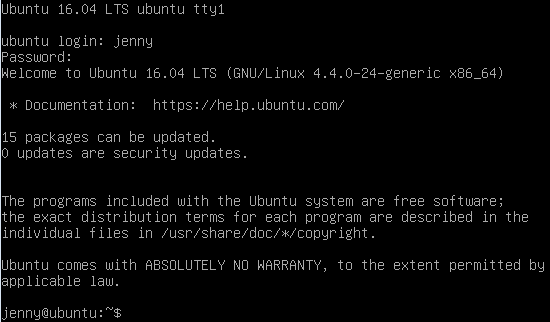
Since we are not logged in as the root (superuser), we are presented with the dollar sign instead of the # if we were to be logged in as the user root.
Step 5: View your present directory.
jenny@ubuntu:~$ pwd

Step 6: Go back one directory level to the /home directory.
jenny@ubuntu:~$ cd ..

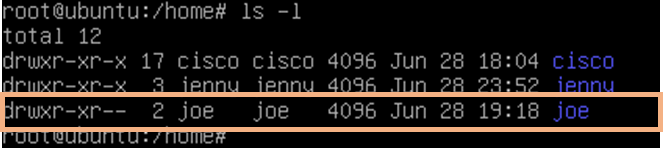
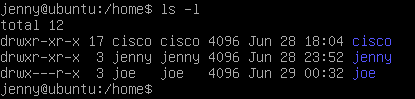
Step 7: List all directories and their permissions.
jenny@ubuntu:/home$ ls -l
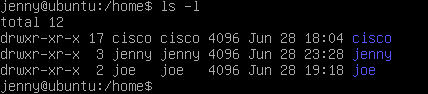
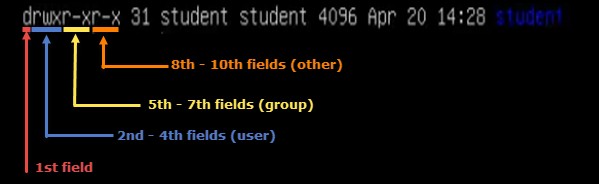
The Linux operating system has a total of 10 letters or dashes in the permissions fields:
- The first field is a dash for a file an a d for a directory
- The 2nd through 4th fields are for the user
- The 5th through 7th fields are for the group
- The 8th through 10th fields are for others (accounts other than those in the group)
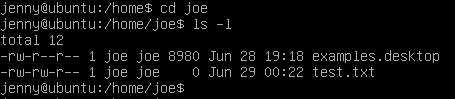
Step 8: Enter Joe’s folder as Jenny by typing the command cd joe.
jenny@ubuntu:/home$ cd joe

Notice that we are able to go into Joe’s home folder.
jenny@ubuntu:/home/joe$ cd ..

Step 9: Press and hold CTRL+ALT+F2 to switch to another Terminal session (tty2).
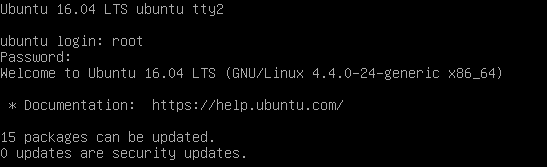
Step 10: Login as the user root with the password secretpassword.
Note: If you are unable to use tty2 terminal, return to graphical user interface (GUI) of the host by using CTRL+ALT+F7 and open a terminal window in the GUI Ubuntu OS. At the prompt, enter sudo -i at the prompt and enter the password password.

Step 11: Change to the /home directory.
root@ubuntu:~# cd /home

Step 12: Change the “other” permission on joe’s folder by making it non-executable.
root@ubuntu:/home# chmod o-x joe

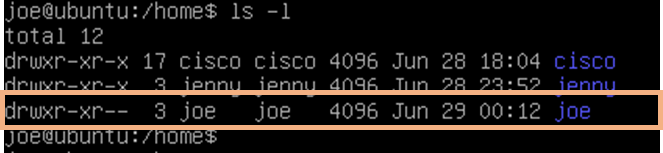
Step 13: List the directories once more with their respective permissions.
root@ubuntu:/home# ls -l
Notice now that there are two dashes in the “others” field for joe’s folder.
Step 14: Press and hold CTRL+ALT+F1 to switch back to the other Terminal session (tty1). Make sure you are viewing the following command prompt: jenny@ubuntu:/home$.
Step 15: Attempt to go into Joe’s folder once more.
jenny@ubuntu:/home$ cd joe

Notice that we do not have the permissions to do so.
The chart below shows examples of other ways the chmod command can be used:
| chmod command | Results |
| chmod u+rwx | Adds read, write, and execute permissions for the user |
| chmod u+rw | Adds read and write permission for the user |
| chmod o+r | Adds read permission for others |
| chmod g-rwx | Removes read, write, and execute permissions for the group |
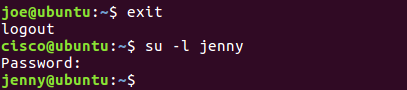
Step 16: Type exit followed by pressing Enter to logout of the Terminal session.
Part 4: Absolute Permissions
Step 1: Login as the user joe with the password tooth while on tty1.
Note: If you are unable to use tty1 terminal, return to graphical user interface (GUI) of the host by using CTRL+ALT+F7 and open a terminal window in the GUI Ubuntu OS. At the prompt, enter sudo –l joe at the prompt and enter the password tooth.

Step 2: Print your current working directory.
joe@ubuntu:~$ pwd

Step 3: Go back one directory level to the /home directory.
joe@ubuntu:~$ cd ..

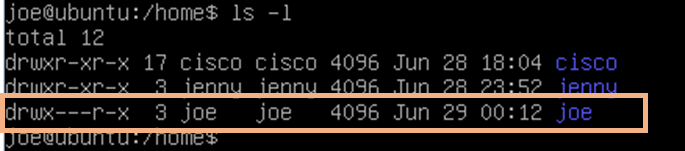
Step 4: List all directories and their permissions in the current working directory.
joe@ubuntu:/home~$ ls -l
Notice that Joe’s folder is set so that “others” are not able to access the folder.
The other way of assigning permissions besides using symbolic permissions is the use of absolute permissions. Absolute permissions use a three digit octal number to represent the permissions for owner, group and other.
The table below outlines each absolute value and its corresponding permissions:
| Number | Permissions |
| 7 | Read, Write, and Execute |
| 6 | Read and Write |
| 5 | Read and Execute |
| 4 | Read |
| 3 | Write and Execute |
| 2 | Write |
| 1 | Execute |
| 0 | None |
By typing the command chmod 764 examplefile, the examplefile will be assigned the follow permissions:
- The user will get read, write and execute permissions
- The group will get read and write permissions
- Others will get read access
Breakdown of how 764 represents these permissions:
| Digit | Binary Equivalent | Permission |
| 7 (user) | 111 | 1-Read 1-Write
1-Execute |
| 6 (group) | 110 | 1-Read 1-Write
0-No Execute |
| 4 (others) | 100 | 1-Read
0-No Write 0-No Execute |
Step 5: Modify the “others” field for Joe’s folder so that others will be able read and execute but not write while still maintaining the “user” field to read, write, and execute.
joe@ubuntu:/home$ chmod 705 joe

Step 6: List the file permissions of the current directory to see that the absolute changes were made.
joe@ubuntu:/home$ ls -l
Step 7: Change to the /home/joe directory.
joe@ubuntu:/home$ cd joe

Step 8: Create a simple text file named test.txt using touch.
joe@ubuntu:~$ touch test.txt

- Type exit followed by pressing Enter to log out of Joe’s session.
- While on the tty1 Terminal, log back in as jenny and enter the password lasocial. Press Enter.
Note: If you are unable to use tty1 terminal, return to graphical user interface (GUI) of the host by using CTRL+ALT+F7 and open a terminal window in the GUI Ubuntu OS. At the prompt, enter su –l jenny at the prompt and enter the password lasocial.
cisco@ubuntu:~$ su –l jenny
Step 9: Change to the /home directory.
jenny@ubuntu:~$ cd /home

Step 10: List all directories with their respective permissions.
jenny@ubuntu:/home$ ls -l
Step 11: Change to the /home/joe directory and list the content of the directory.
jenny@ubuntu:/home$ cd joe
jenny@ubuntu:/home/joe$ ls -l
Notice that we are able to enter Joe’s folder and read the files within the directory. We are able to see the test.txt file.
Step 12: Attempt to create a file.
jenny@ubuntu:/home/joe$ touch jenny.txt

Notice we do not have permission to create the file.