Last Updated on November 6, 2018 by Admin
11.2.1.6 Lab – Install a Printer in Windows 7 and Vista Answers
Lab – Install a Printer in Windows 7 and Vista (Answers Version)
Introduction
In this lab, you will install a printer. You will find, download, and update the driver and the software for the printer.
Recommended Equipment
- A computer running Windows 7 or Vista
- Internet connection
- Printer
Step 1: Connect a USB printer.
If you are installing a USB printer, plug the printer into the computer using a USB cable. Plug the printer power cord into an AC outlet, if necessary. Unlock the printer if it is locked. Refer to the instruction manual if you do not know how to unlock the printer. Printer heads are often locked to prevent damage during shipment.
Step 2: Install the printer driver.
- Windows detects the new hardware and attempts to load the appropriate driver.
- If Windows is unable to load the appropriate driver, skip to Step 3 to download and install the most recent printer driver.
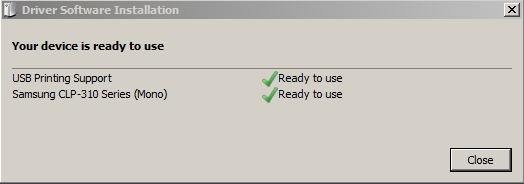
- Click the Installing device driver software bubble to determine the installation status.

11.2.1.6 Lab – Install a Printer in Windows 7 and Vista Answers 01
- Click Close in the Driver Software Installation screen after viewing the messages.
Step 3: Download a current version of the printer driver.
This step should be completed even if Windows installed a driver in Step 2. In order to ensure that your computer has the most current driver, find the manufacturer and the model number of the printer.
- Visit the manufacturer’s web site and navigate to the product downloads or support page. Download the most recent driver and software for the model of printer device that you have installed. The software and driver must be compatible with your operating system. Make sure to download the driver with a matching architecture for your computer (x64 or x32), if necessary.
- Download the driver, often found in archive format, and extract to a temporary folder on your desktop, if necessary.
- The installation wizard may start automatically after the file extraction.
- Follow the installation wizard instructions until the software and driver installation is complete. Reboot the computer, if necessary.
Step 4: Print a test page.
- To verify printer functionality, click Control Panel > Devices and Printers.
- Right-click the printer and select Printer Properties.
- Click Print Test Page.

11.2.1.6 Lab – Install a Printer in Windows 7 and Vista Answers 02
Reflection
Why would you download and install software and drivers when windows already installs them for you?
__________________________________________________________________________________________
__________________________________________________________________________________________
__________________________________________________________________________________________
Answers vary. Manufacturers will have the most current drivers and software. These files may provide enhancements or features that the Windows drivers do not provide.