Last Updated on November 5, 2018 by Admin
10.4.1.4 Lab – Install Linux in a Virtual Machine and Explore the GUI Answers
Lab – Install Linux in a Virtual Machine and Explore the GUI (Answers Version)
Objectives
Part 1: Preparing a Computer for Virtualization
Part 2: Installing a Linux OS on the Virtual Machine
Part 3: Exploring the GUI
Background / Scenario
Computing power and resources have increased tremendously over the last 10 years. A benefit of multi-core processors and large amounts of RAM is the ability to install multiple operating systems or use virtualization on a computer. With more than one operating systems installed, the user can switch between operating systems by restarting the computer and choosing the operating system to boot.
With virtualization, one or more virtual computers can operate inside one physical computer. Virtual computers that run within physical computers are called virtual machines. Virtual machines are often called guests, and physical computers are often called hosts. Anyone with a modern computer and operating system can run virtual machines.
In this lab, you will install a Linux OS in a virtual machine using a desktop virtualization application, such as VirtualBox. After completing the installation, you will explore the GUI interface. You will also explore the command line interface using this virutal machine in a later lab in this course.
Required Resources
- Computer with a minimum of 2 GB of RAM and 10 GB of free disk space
- High speed Internet access to download Oracle VirtualBox and Linux OS image, such as Ubuntu Desktop 14.04.
Part 1: Preparing a Computer for Virtualization
In Part 1, you will download and install desktop virtualization software and a Linux OS image. Your Answers may provide you with a Linux OS image.
Step 1: Download and install VirtualBox.
VMware Player and Oracle VirtualBox are two virtualization programs that you can download and install to support the OS image file. In this lab, you will use the VirtualBox application. To download and install VirtualBox:
- Navigate to http://www.oracle.com/technetwork/server-storage/virtualbox/downloads/index.html.
- Choose and download the appropriate installation file based on your operating system. If you are running a Windows OS, click the Windows Installer to download the file.
- After the VirtualBox installation file is downloaded, run the installer and accept the default installation settings.
Step 2: Download a Linux Image.
- Navigate to the Ubuntu website at http://www.ubuntu.com/download/desktop to download and save a Ubuntu Desktop image.
- Select the 64-bit or 32-bit version of the OS. Click Download to start downloading the image. Scroll down the web page and click Not now, take me to the download if necessary to bypass the donation prompt. Then select Save File and click OK to save the file.
Note: The 64-bit version is recommended.
10.4.1.4 Lab – Install Linux in a Virtual Machine and Explore the GUI Answers 01
Part 2: Installing a Linux OS on the Virtual Machine
Step 1: Create a New Virtual Machine.
- Click Start and search for Virtualbox. Click Oracle VM VirtualBox to open the manager. When the manager opens, click New to start the Ubuntu installation.

10.4.1.4 Lab – Install Linux in a Virtual Machine and Explore the GUI Answers 02
- In the Name and operating system screen, type Ubuntu in the Name field. For the Type field, select Linux. In the Version field, select Ubuntu (64-bit) if that is the version downloaded from the Ubuntu website. Otherwise, select the corresponding downloaded version. Click Next to continue.

10.4.1.4 Lab – Install Linux in a Virtual Machine and Explore the GUI Answers 03
- In the Memory size screen, increase the amount of RAM if desired as long as the amount of RAM for the virtual machine is in the green area. Going beyond the green area would adversely affect the performance of the host. Click Next to continue.

10.4.1.4 Lab – Install Linux in a Virtual Machine and Explore the GUI Answers 04
- In the Hard disk screen, click Create to create a virtual hard disk now.

10.4.1.4 Lab – Install Linux in a Virtual Machine and Explore the GUI Answers 05
- In the Hard disk file type screen, use the default file type settings of VDI (VirtualBox Disk Image). Click Next to continue.

10.4.1.4 Lab – Install Linux in a Virtual Machine and Explore the GUI Answers 06
- In the Storage on physical hard disk screen, use the default storage settings of dynamically allocated. Click Next to continue.

10.4.1.4 Lab – Install Linux in a Virtual Machine and Explore the GUI Answers 07
- In the File location and size screen, you can adjust the hard drive and change the name and location of the virtual hard drive. Click Create to use the default settings.

10.4.1.4 Lab – Install Linux in a Virtual Machine and Explore the GUI Answers 08
- When the hard drive creation is done, the new virtual machine is listed in the Oracle VM VirtualBox Manager window. Select Ubuntu and click Start (
 ) in the top menu.

10.4.1.4 Lab – Install Linux in a Virtual Machine and Explore the GUI Answers 09
Step 2: Install Ubuntu on the virtual machine.
- When the virtual machine starts the first time without an installed OS, you are prompted to provide a location where an image of the OS can be found.
If you downloaded the operating system, click the file manager icon ( ) to browse the OS image location in the file system. Select the file with .iso extension and click Open to start the installation.
If the operating system is on an optical disk, select the location of the optical driver that contains the optical disk.
Click Start to continue. Only complete the next step if you were not prompted for an operating system.
10.4.1.4 Lab – Install Linux in a Virtual Machine and Explore the GUI Answers 10
- If you were able to locate the.iso and press Start in the previous step, skip this step. If you were not prompted an OS image, return to the Oracle VM Virtualbox Manager window. Right-click Ubuntu and select Settings. In the Ubuntu – Settings window, click Storage in the left panel. Click Empty in the middle panel. In the right panel, click the CD symbol (
 ) and select the file location of the OS. Click OK to continue.
In the Oracle VM VirtualBox Manager window. Select Ubuntu and click Start ( ) in the top menu.
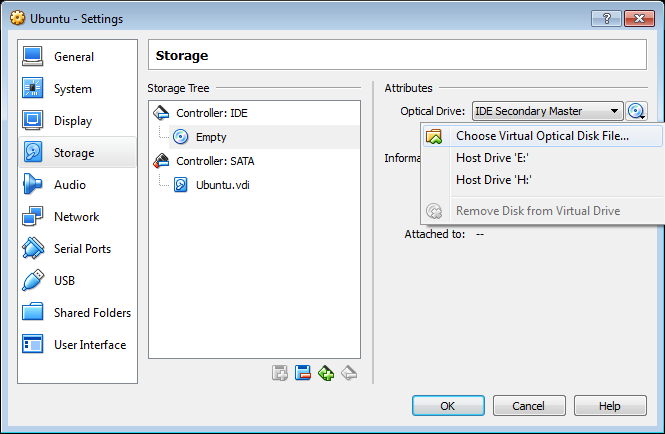
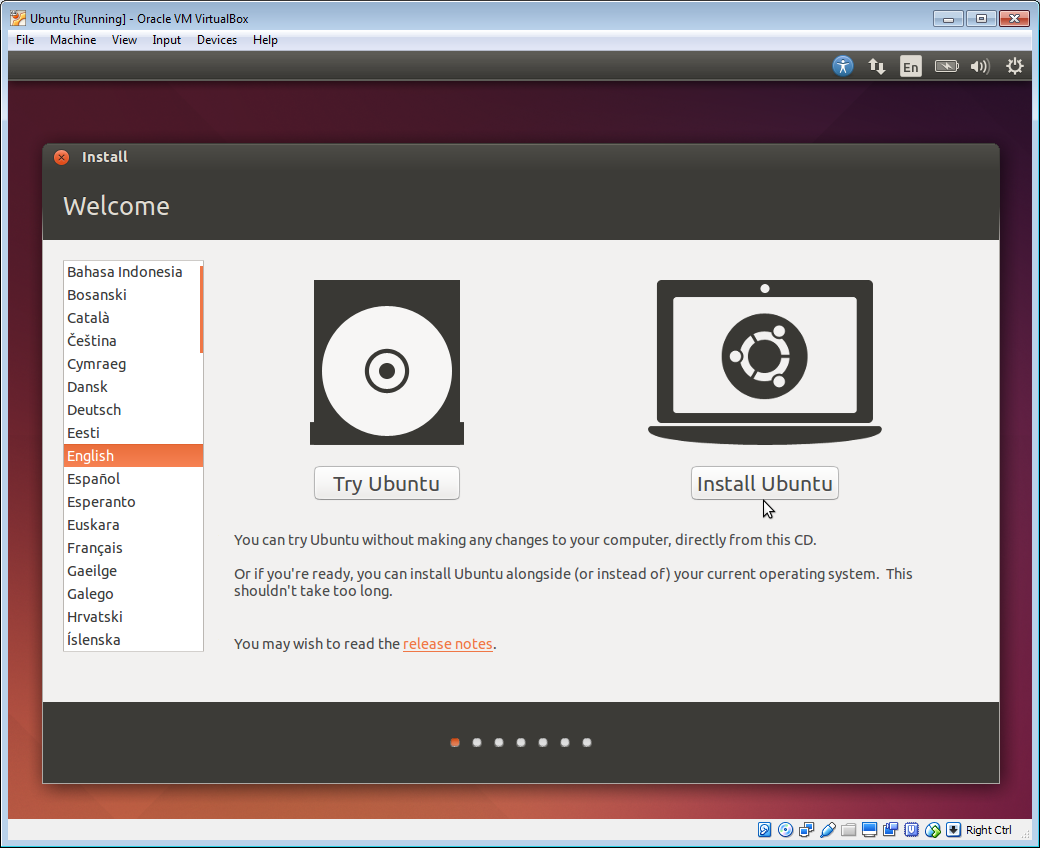
- In the Welcome screen, you are prompted to try or install Ubuntu. In this lab, you will install the Ubuntu OS in this virtual machine. Click Install Ubuntu.
- In the Preparing to install Ubuntu screen, verify that the computer meets the installation requirements represented by the green check marks. Select Download updates while installing and Install this third-party software if desired. Click Continue.
Note: If you are not connected to the Internet, you can continue to install and enable the network later.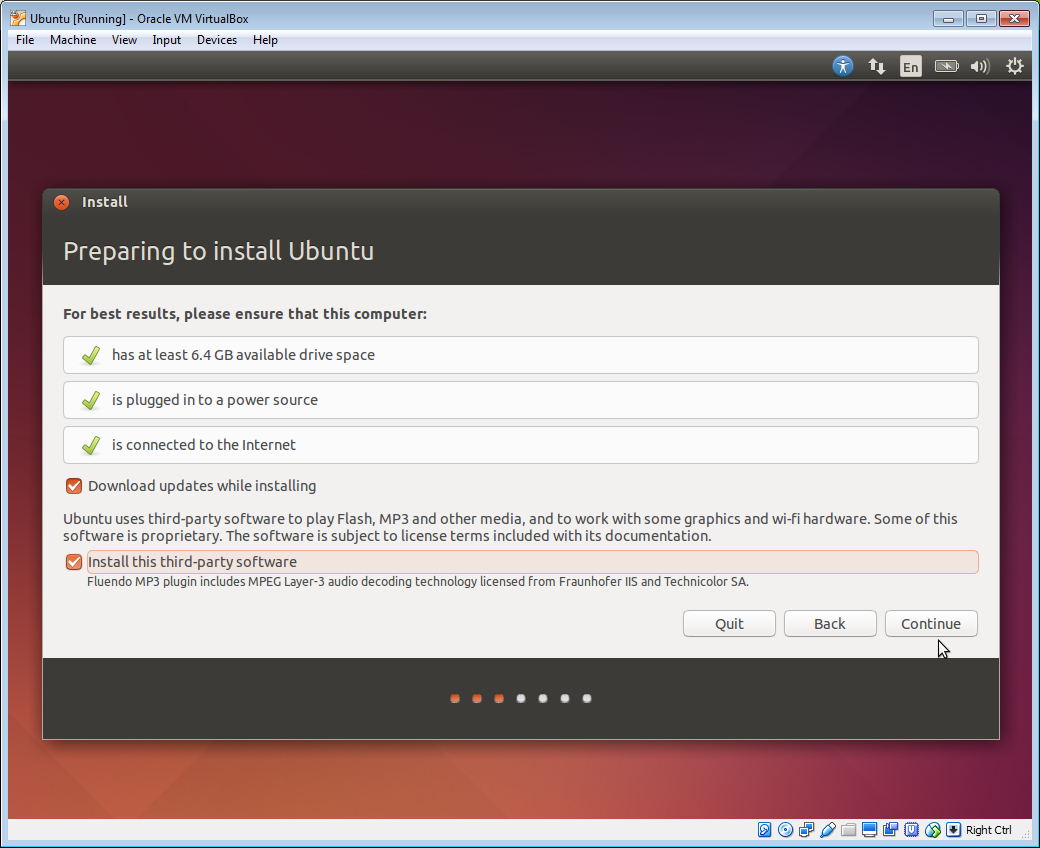
- Because this Ubuntu installation is in a virtual machine, it is safe to erase the disk and install Ubuntu without affecting the host computer. Select Erase disk and install Ubuntu. Otherwise installing Ubuntu on a physical computer would erase all data in the disk and replace the existing operating system with Ubuntu. Click Install Now to start the installation.
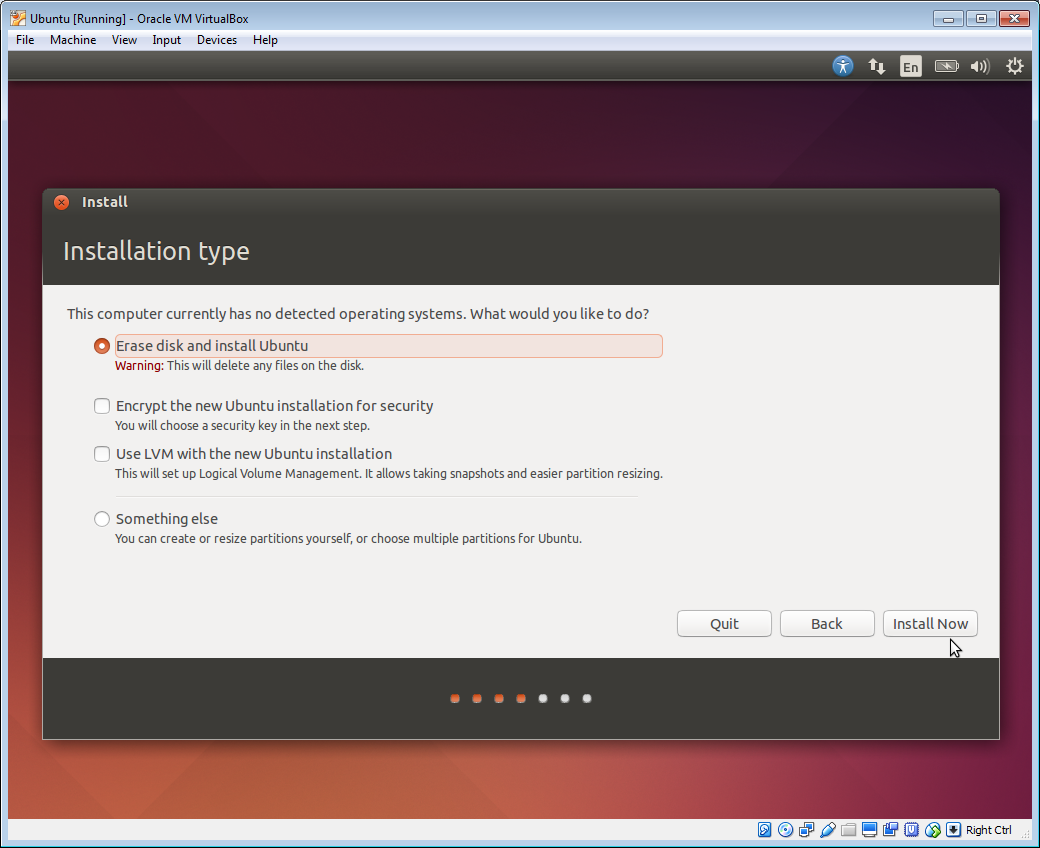
- Click Continue to erase the disk and install Ubuntu.
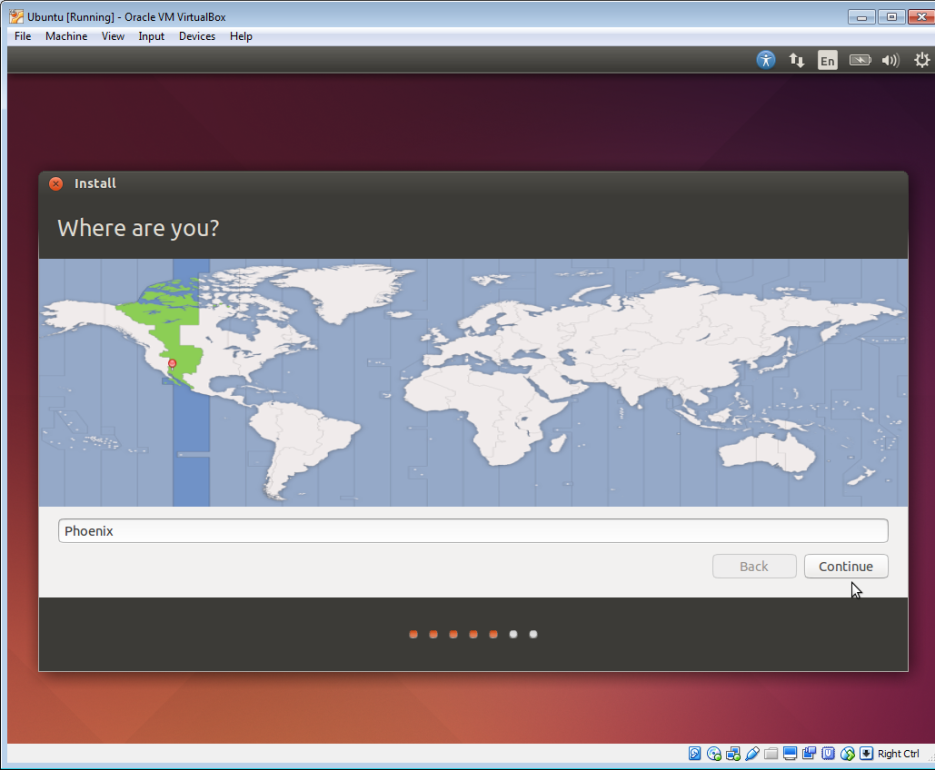
- In the Where are you? screen, verify that the location listed is correct. Otherwise, type your location in the field and select the desired location in the provide list. Then click Continue.
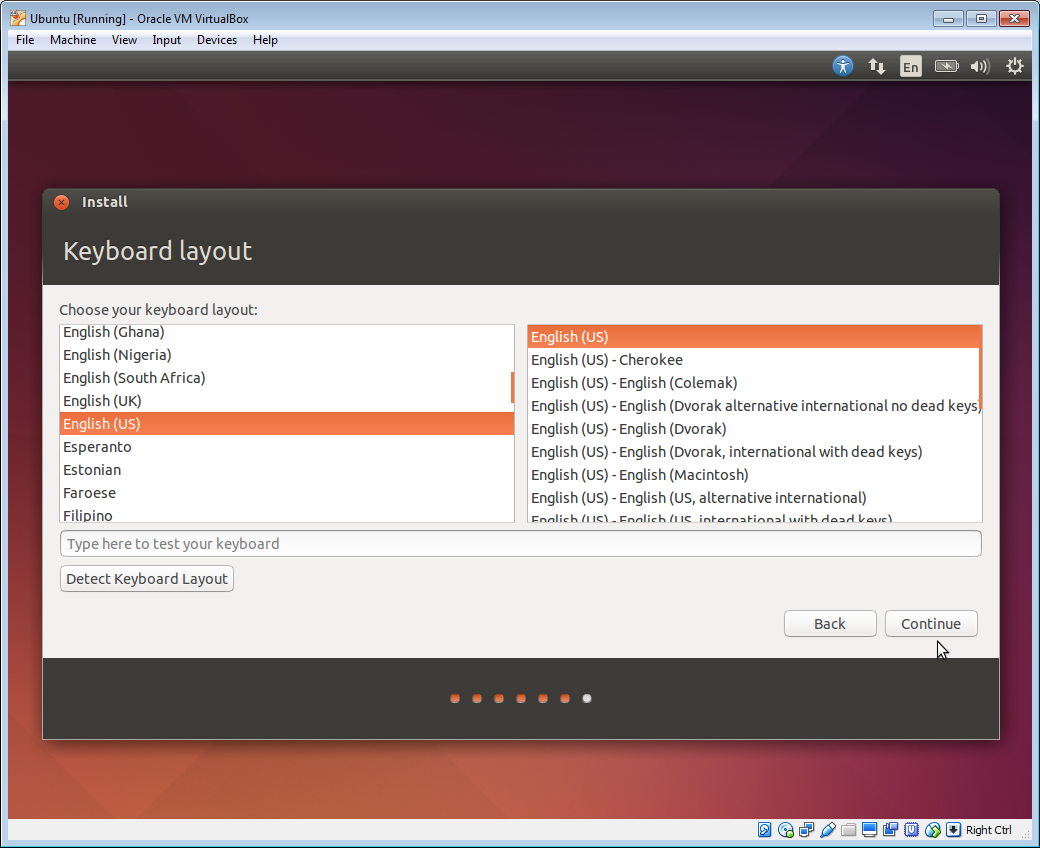
- In the Keyboard layout screen, verify that the correct keyboard layout is selected. If desired, type some text in the Type here to test your keyboard field to verify the keyboard layout. Click Continue.
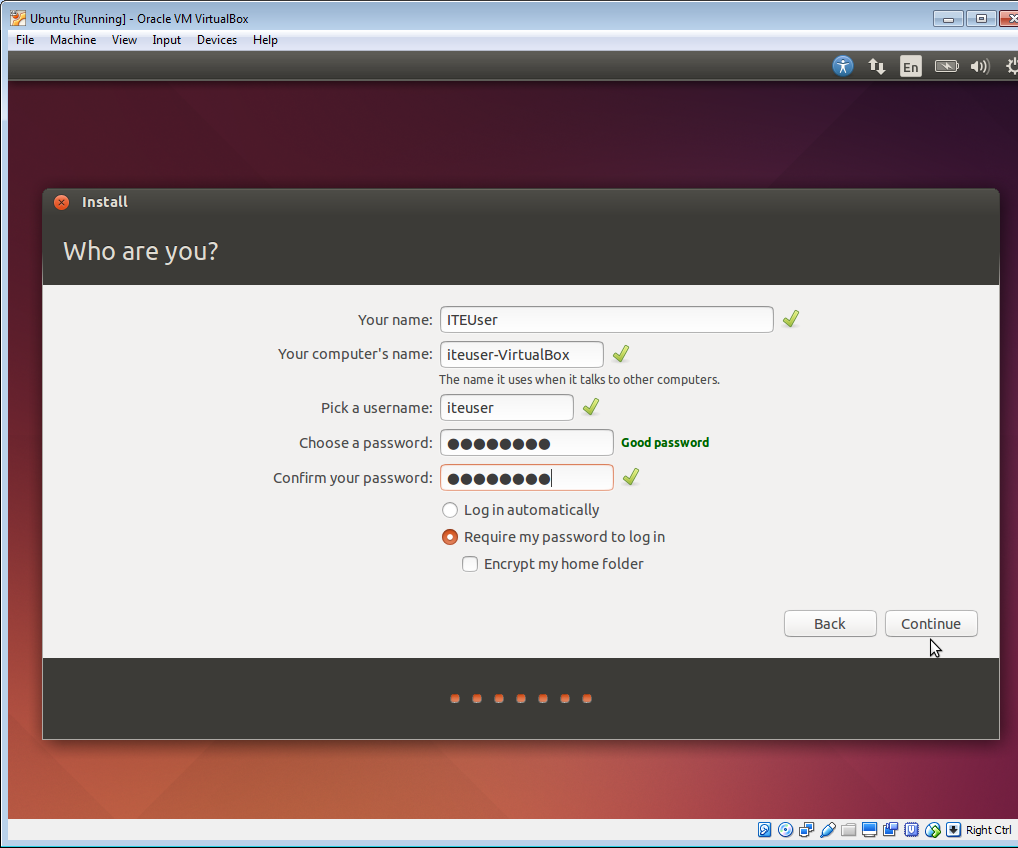
- In the Who are you? screen, provide your name and choose a password. Use ITEUser for Your Name and ITEpass! for the password. You can use the username generated or enter a different username. If desired, you can change the other settings. Click Continue.
- The Ubuntu OS is now installing in the virtual machine. This will take several minutes. When the Installation Complete window displays, click Restart Now to use the new installation. If there is an installation disk in the optical drive, remove the media and close the tray and press Enter to continue.
Part 3: Exploring the GUI
In this part, you will install the VirtualBox guest additions and explore the Ubuntu GUI.
Step 1: Install Guest Additions.
- Log into your Ubuntu virtual machine using the user credentials created in the previous part.
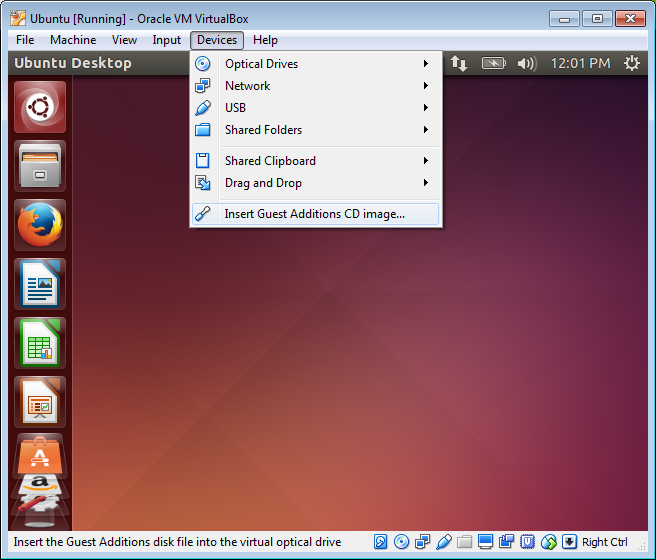
- Your Ubuntu Desktop window may be smaller than expected. This is especially true on high resolution displays. Click Device > Insert Guest Additions CD image… to install the Guest Additions. This allows more functions, such as changing the screen resolution in the virtual machine.
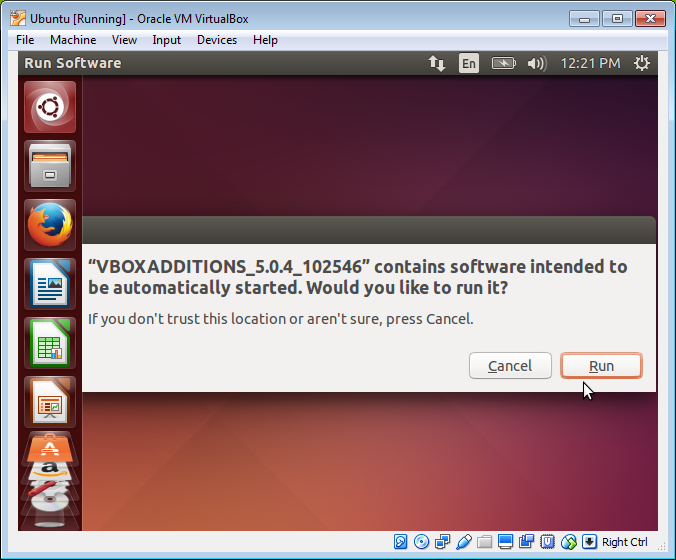
- Click Run to install the additions. When prompted for a password, use the same password that you used to log in. Click Authenticate to continue.
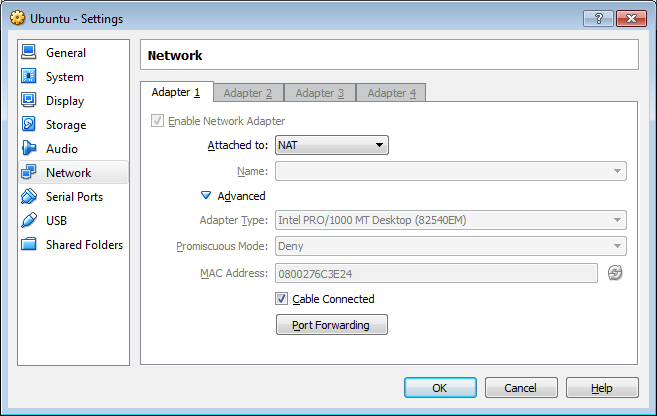
- If the computer was not connected to the Internet during the installation, click Devices > Network Settings in the Oracle VirtualBox menu. Enable network adapters and configure the proper setting for network connections as necessary. Click OK.
- When the installation of the additions is done, restart the virtual machine again. Click Settings (
 ) in the upper right corner and click Shut down. Click Restart to restart Ubuntu.
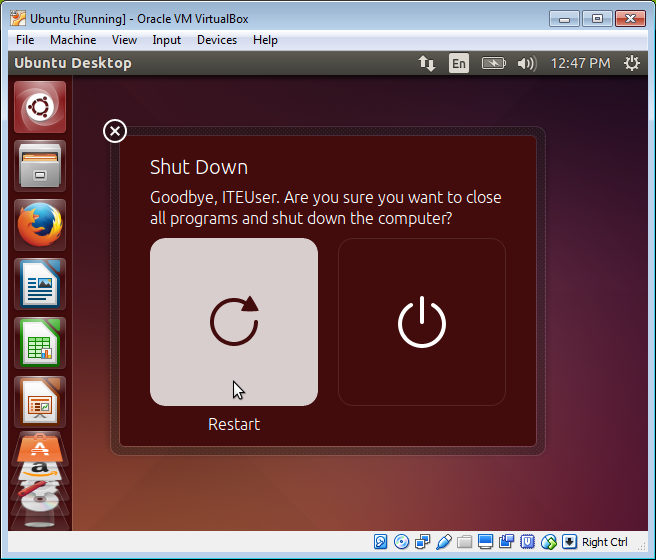
Step 2: Open a web browser.
- Log into Ubuntu again. After you are log in again, you can resize the virtual machine window.
- Click Dash (
 ) to search your computer and online resources. Type web browser and click your desired web browser under the Applications heading and navigate to different web sites.
- To access the command line interface, click Dash and type terminal to display a list of terminal emulators are listed under the Applications header.
How many are available to you and what are their names?____________________________________________________________________________________
____________________________________________________________________________________
____________________________________________________________________________________
Three terminal emulators are available: Terminal, UXTerm, and XTerm.
Reflection
What are the advantages and disadvantages of using a virtual machine?
_______________________________________________________________________________________
_______________________________________________________________________________________
With a virtual machine, you are able to test new applications or operating systems without affecting your host machine. You are also able to save the current machine state when you close virtual machine. If you have any issues, you have the option to revert the virtual machine to a previously saved state. On the other hand, a virtual machine requires hardware resources from the host machine, such as hard drive space, RAM, and processing power.