Last Updated on January 28, 2021 by Admin
3.3.3.2 Lab – View Wired and Wireless NIC Information Answers
Lab – View Wireless and Wired NIC Information (Answers Version)
Answers Note: Red font color or gray highlights indicate text that appears in the Answers copy only.
Objectives
Part 1: Identify and Work with PC NICs
Part 2: Identify and Use the System Tray Network Icons
Background / Scenario
This lab requires you to determine the availability and status of the network interface cards (NICs) on the PC. Windows provides a number of ways to view and work with your NICs.
In this lab, you will access the NIC information of the PC and change the status of these cards.
Required Resources
- 1 PC (Windows 10 with two NICs, wired and wireless, and a wireless connection)
- A home / small office wireless router, such as a Linksys EA6500
Part 1: Identify and Work with PC NICs
In Part 1, you will identify the NIC types in the PC. You will explore different ways to extract information about these NICs and how to activate and deactivate them.
Note: This lab was performed using a PC running on the Windows 10 operating system. You should be able to perform the lab with another Windows operating systems version. However, menu selections and screens may vary.
Step 1: Use Network connections.
You will verify which network connections are available.
- Open the Network Connections window by right-clicking the Windows Start button > Network Connections.
- The Network Connections window displays the list of NICs available on this PC. Look for your Local Area Connection and Wireless Network Connection adapters in this window.
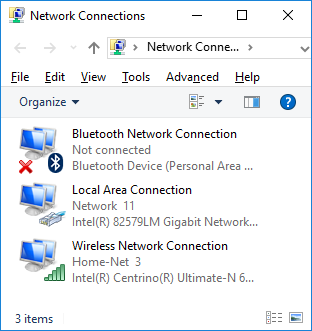 Note: Other types of network adapters, such as Bluetooth Network connection and Virtual Private Network (VPN) adapter, may also be displayed in this window.

Step 2: Work with your wireless NIC.
Verify the wireless network connection settings.
- Select the Wireless Network Connection option. Right-click on it to display a drop-down list. The first option displays if your wireless NIC is enabled or disabled. Currently, this NIC is enabled which is why the Disable option is displayed. If your wireless NIC is disabled, you will have an option to Enable it.
- Click Status to open the Wireless Network Connection Status window.
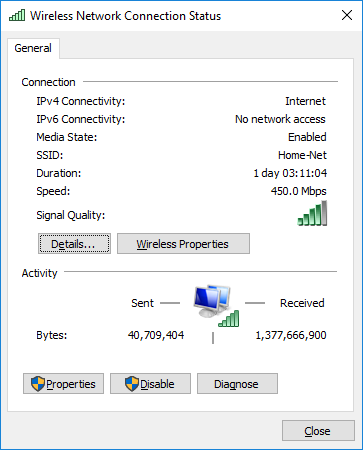 What is the Service Set Identifier (SSID) for the wireless router of your connection?__________________________ Home-Net (in above example)
What is the speed of your wireless connection?
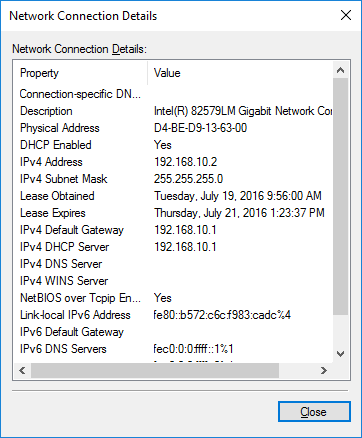
__________________________ 450.0 Mb/s (in above example) - Click Details to display the Network Connection Details window.
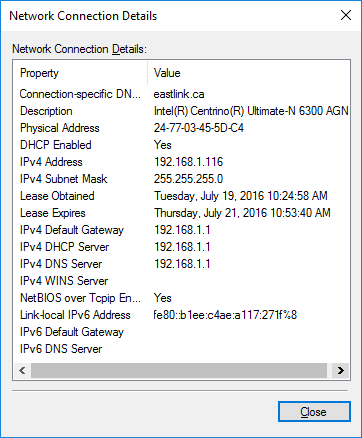 What is the MAC address of your wireless NIC?
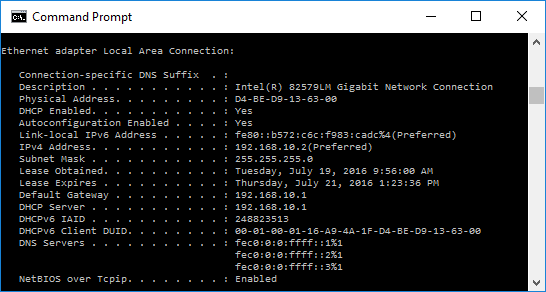
______________________________________ 24-77-03-45-5D-C4 (in above example) - Open a command window prompt and type ipconfig /all.
C:\Users\Bob> ipconfig /all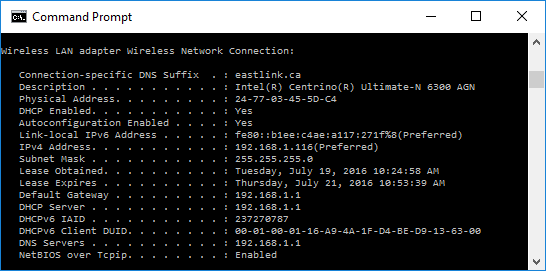 Notice the information displayed is similar to the Network Connection Details window information. When you have reviewed the details, click Close to return to the Wireless Network Connection Status window.
 - Return to the Wireless Network Connection Status window. Click Wireless Properties to open the Wireless Network Properties window of the Home-Net network.
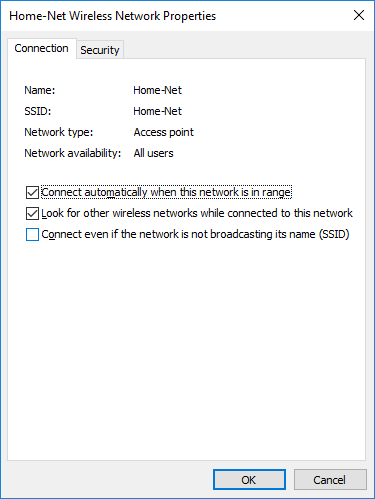
- You should always use wireless security whenever available. To verify (or configure) the wireless security options click on the Security tab.
 The window displays the type of security and encryption method enabled. You can also enter (or change) the security key in this window. Close all windows.

Step 3: Work with your wired NIC.
We will now verify the wired network connection settings.
- Open the Network Connections window by right-clicking Windows Start > Network Connections.
- Select and right-click the Local Area Connection option to display the drop-down list. If the NIC is disabled, enable it.
- Click the Status option to open the Local Area Connection Status window. This window displays information about your wired connection to the LAN.
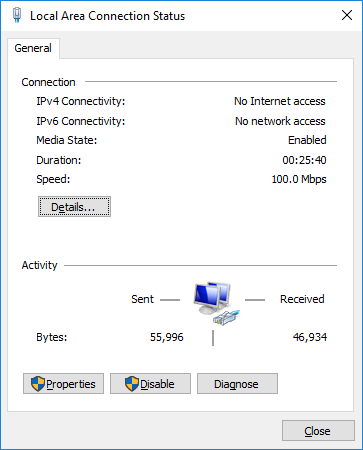
- Click Details… to view the address information for your LAN connection.
- Open a command window prompt and type ipconfig /all. Find your Local Area Connection information and compare this with the information displayed in the Network Connection Details window.
- Close all windows on your desktop.
Part 2: Identify and Use the System Tray Network Icons
In Part 2, you will use the network icons in your system tray to display the networks available on the network.
Step 1: Use the Wireless Network icon.
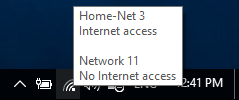
- The bottom right-hand corner of the Windows 10 screen contains the system tray. Move your mouse to display the system tray as shown.
 Note: If your wired network is enabled, a different network icon (
  ) is displayed in the system tray.
 - In this example, the 3rd icon from the left is the wireless network icon. If you hover over it, it displays the currently connected networks.
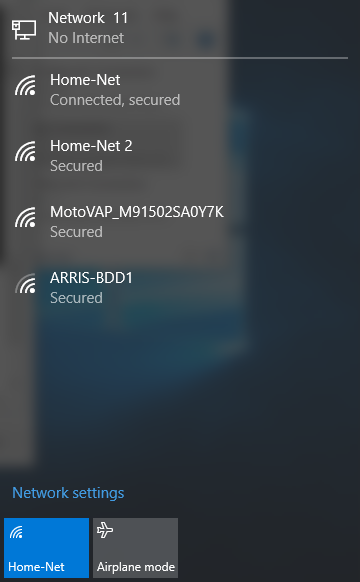
- Click the wireless network icon, and it displays the wired and wireless network SSIDs that are in range of your wireless NIC.
- Right-click the wireless network icon, and it displays a troubleshooting option and to open the Network and Sharing Center window.

- Click on the Open Network and Sharing Center option.
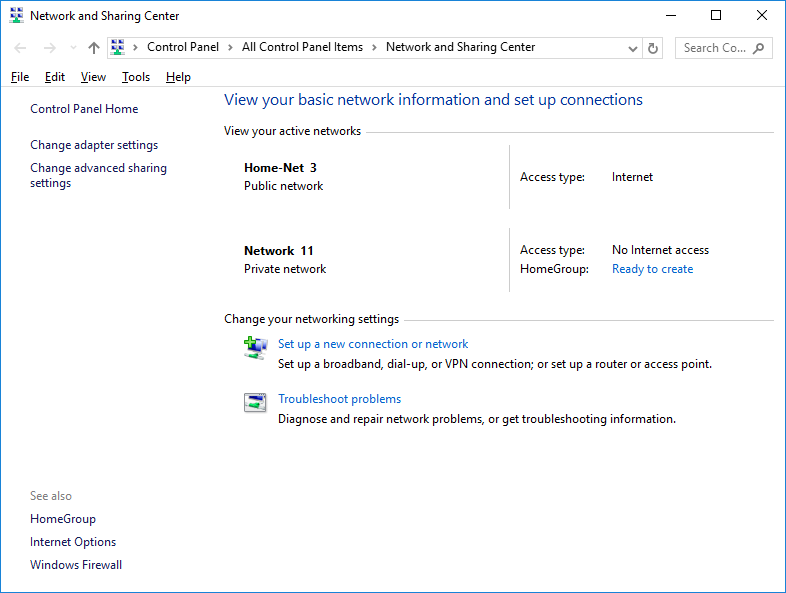
- The Network and Sharing Center is a central window that displays information about the active network or networks, the network type, the type of access.


Reflection
Why would you activate more than one NIC on a PC?
_______________________________________________________________________________________
Answers may vary. Multiple NICs can be used if more than one path is needed for the PC. One example of this would be if the PC is being used as a proxy server.